Tech
Slick Backgrounds for Car Photography with AI Photoshoot
Want to create slick backgrounds for your car photo? This guide will show you how to do that without any photography and editing skills or equipment. And while you're at it, look through the other guides in our latest series which include background generation for footwear, furniture, health and beauty, and food product images.
Guide 1: Custom Approach
The backgrounds of car photos are crucial to the overall style and aesthetic of the entire visual. It’s impossible to overstate the importance of slick backgrounds for car images, as they are capable of catching the eyes of prospective buyers and improving the chances of sales being made.
This guide will demonstrate how to create consistently professional car product images with AI Photoshoot without having the equipment, skills, or knowledge of car photography to make this happen.
Check out our full video tutorial on how to generate backdrops for product images. For a step-by-step tutorial on AI Photoshoot, continue reading the guide below.
Step 1: Upload the Image
Click in this field to upload a photo of your choice.
💡Pro tip: You should use product images with transparent backgrounds in AI Photoshoot. If you do not have a transparent image of your product, simply tick the Remove Background option to make the background transparent automatically.
Step 2: Select Custom
In the panel to the left, you can choose the background scene for your photo. You have the option of selecting from a number of pre-made Scenes or creating a Custom one for yourself.
💡Pro tip: Typically, it is better to use the pre-made Scenes option for most product photos, however in the case of car photography this is an exception since AI Photoshoot has yet to introduce scenes specifically optimized for automotive use.
Step 3: Adjust the Size
AI Photoshoot allows you to resize and adjust the product on the canvas. This is important to the product image and plays a huge role in the overall style and aesthetic of the overall composition.
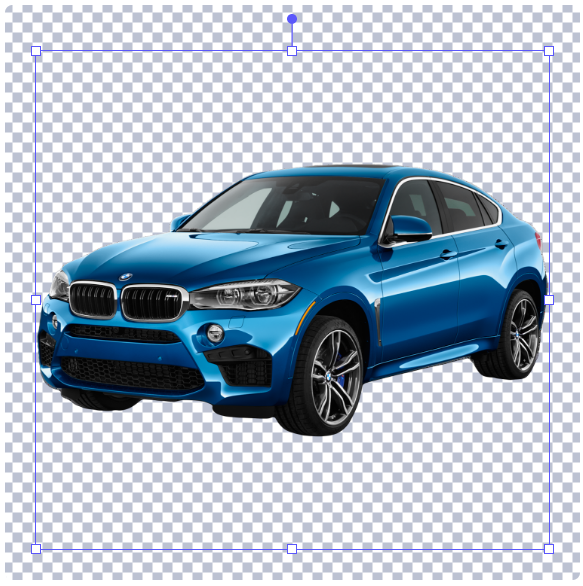
Padding is a crucial element of product photography. It is the empty space on the canvas around the product image itself. The larger the product, the less padding there is, and vice versa.
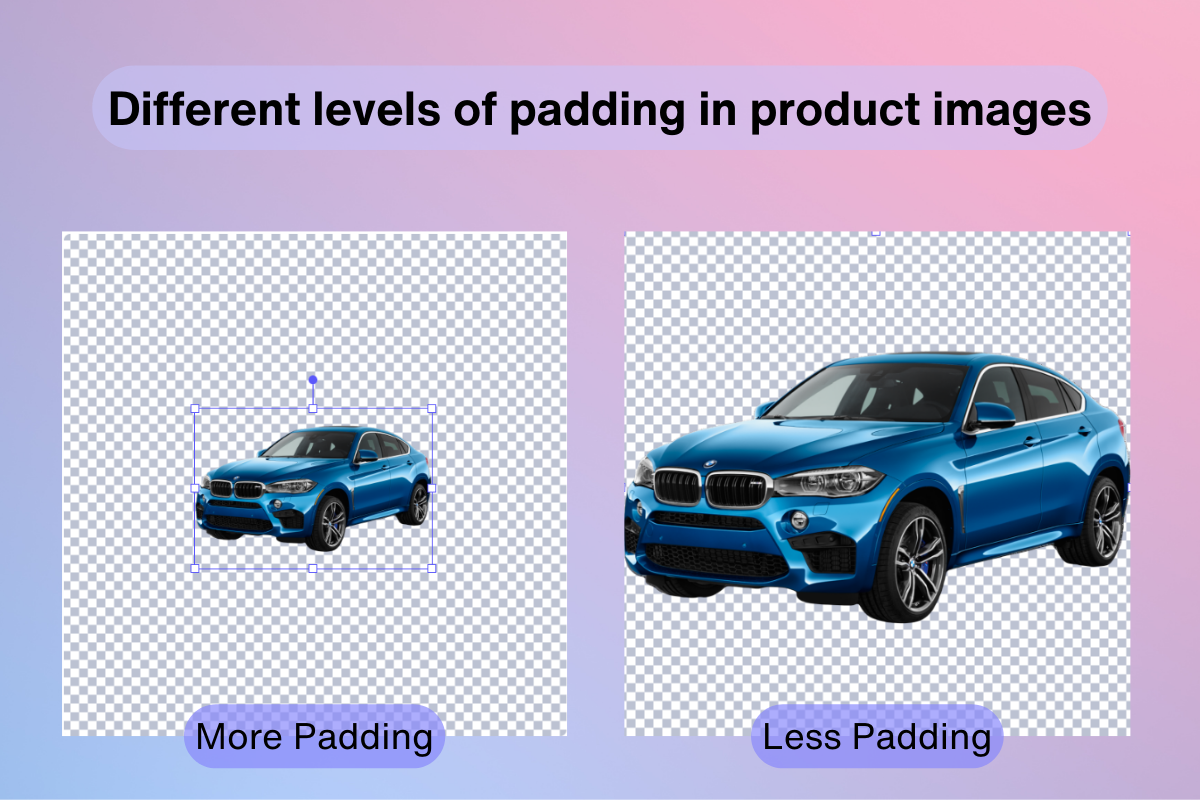
Depending on the type of background you’re generating, you may need to make the product bigger or smaller. Control the padding-to-product ratio of your product photo and find the ideal size for the car on your background.
Step 4: Writing the Prompt
AI Photoshoot is powered by commands given to it by users similar to many other image generation tools. These are called text prompts and knowing how to write one can help you render a background that is as close to your expectations as possible.
While each AI image generator has its own nuances and may be functionally different, some prompt writing tips are more or less universally applicable.
Elements to include in-text prompt:
- Background elements - a park with picnic tables in the background, a cafe with tables and chairs in the background, a playground with slides and swings in the background;
- Time or lighting input - afternoon, morning, sunny weather, cloudy;
- Objects with materials - wooden table, marble countertop, brick wall, stone over;
- Image stylizations - professional photo, noir, impressionist, hyperrealistic, blur.
💡Pro tip: Do not include the product itself in the text prompt. For example, if you have uploaded an image of a shampoo bottle, do not write “shampoo bottle” in the text prompt.
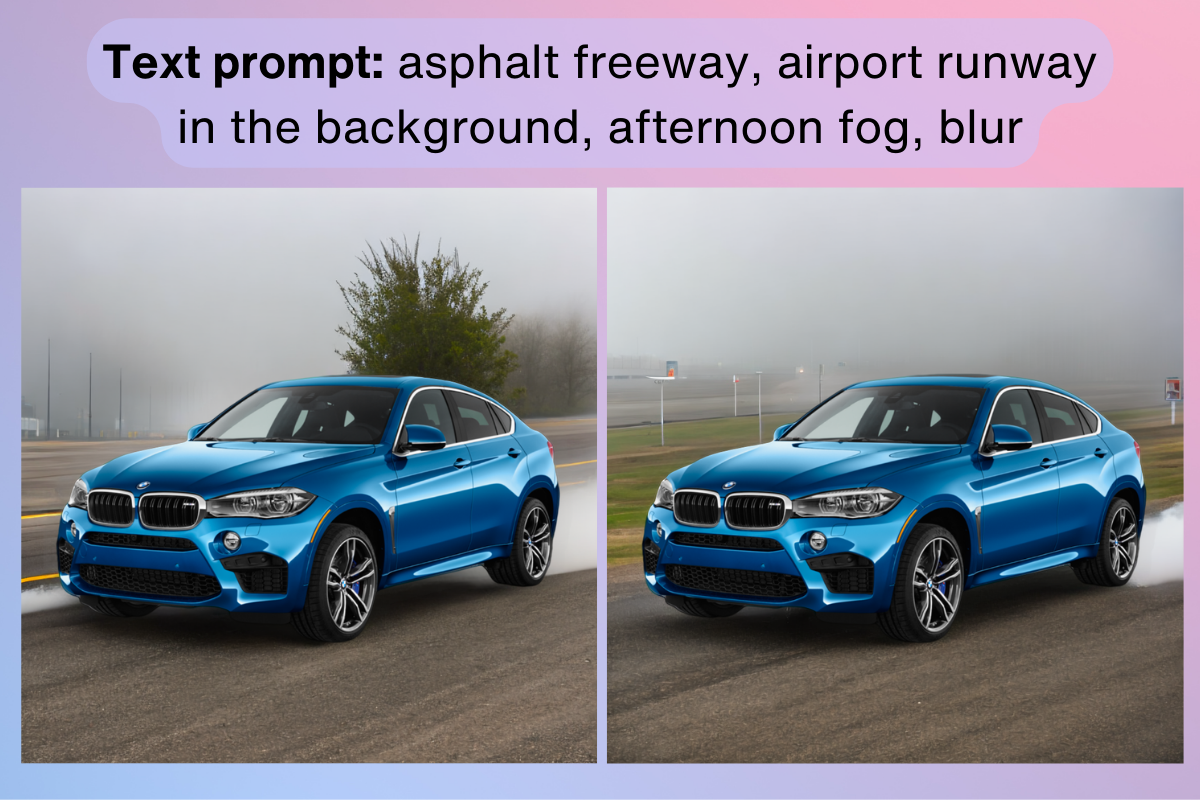
Here are some examples of backgrounds rendered with text prompts.
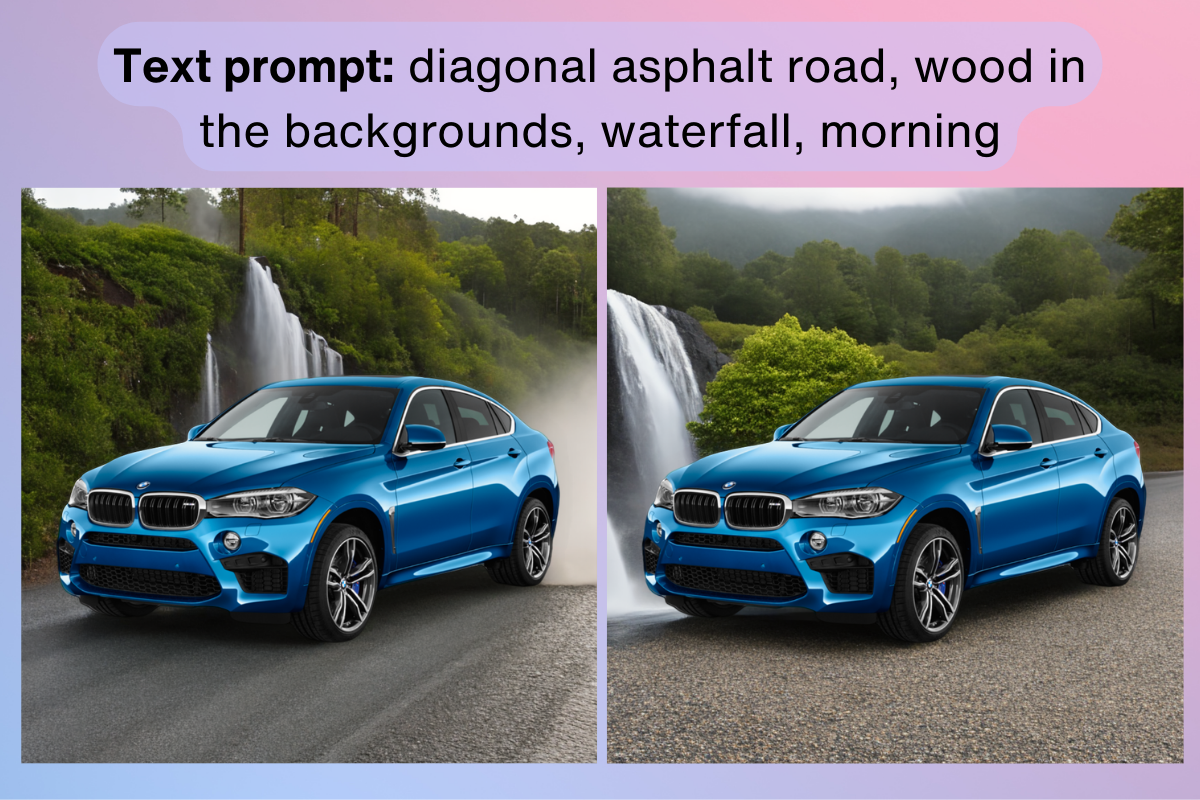
Text prompts work exceptionally well when there is plenty of detail given. The more details you include in the text prompt, the easier it is for the AI to narrow down the results you’re looking for.
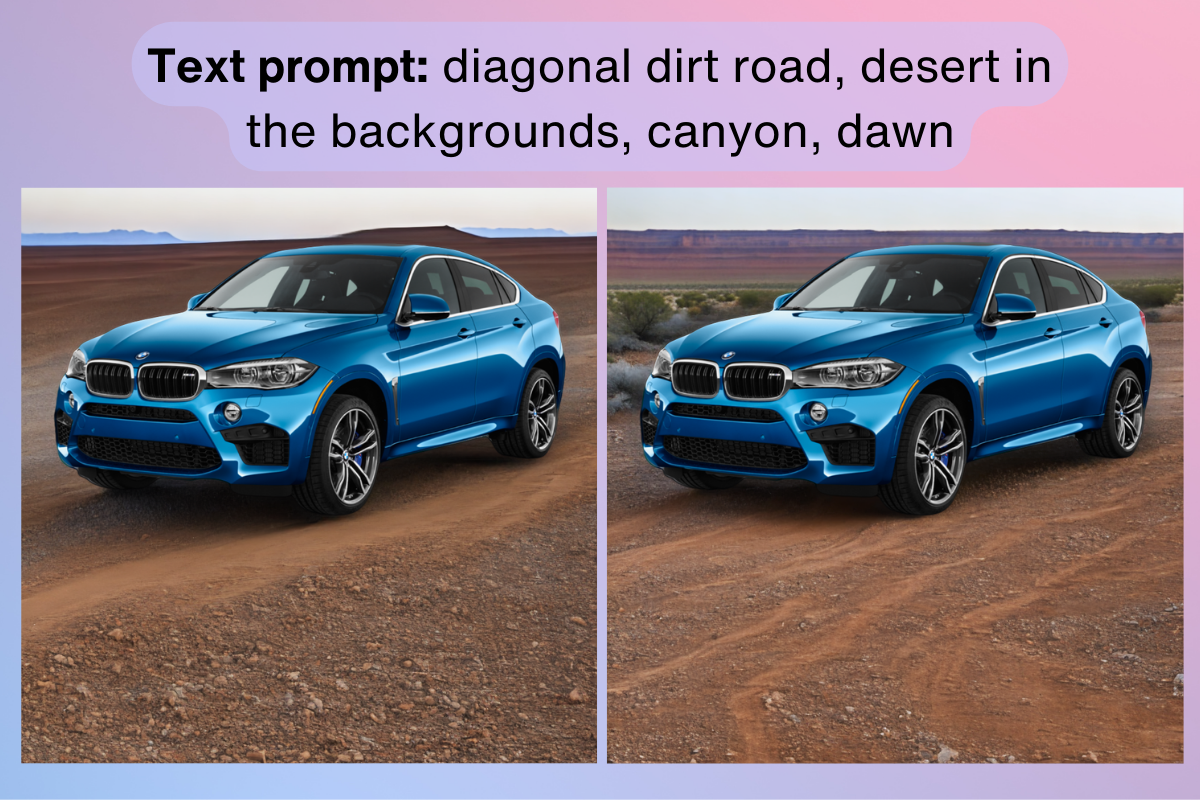
In the example above, you can see how the final stylistic text input of “dawn” changed the lighting and aesthetic of the composition, adding a layer of visual complexity.
Step 5: Download the Image
Click the downward arrow button to save the image to your device.
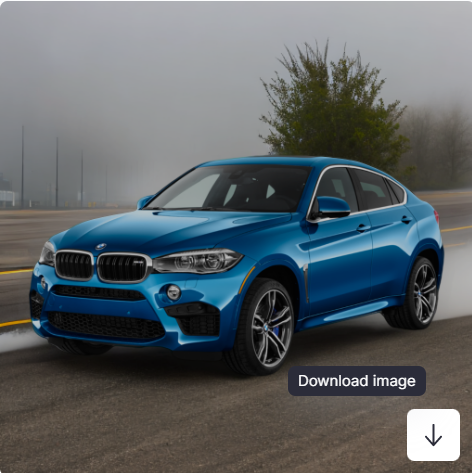
AI Photoshoot renders 4 unique variations of the text prompt. You can choose to download the one that closely matches your expectations or try rendering again using the same text prompt, as the results may be better than the previous time.
Guide 2: Using Pre-Made Scenes
AI Photoshoot’s selection of pre-made and optimized templates can also work quite well for car photos. Here’s how to proceed with pre-made templates if you choose to do so.
Step 1: Upload the Image
Click in this field to upload a photo of your choice.
💡Pro tip: You should use product images with transparent backgrounds in AI Photoshoot. If you do not have a transparent image of your product, simply tick the Remove Background option to make the background transparent automatically.
Step 2: Choose a Scene
In the panel to the left, you can choose the background scene for your photo. You have the option of selecting from a number of pre-made Scenes.
💡Pro tip: When picking the type of scene to use for your car photo image backdrop, it’s important to consider the angle of the photo itself. Match the angle of the scene to the angle of the car itself.
AI Photoshoot allows you to filter scenes shot from the Front and Top. For example, if your car photo was taken from the front angle, select a scene with a Front camera angle.
Resize and Align Product Naturally Into a Scene
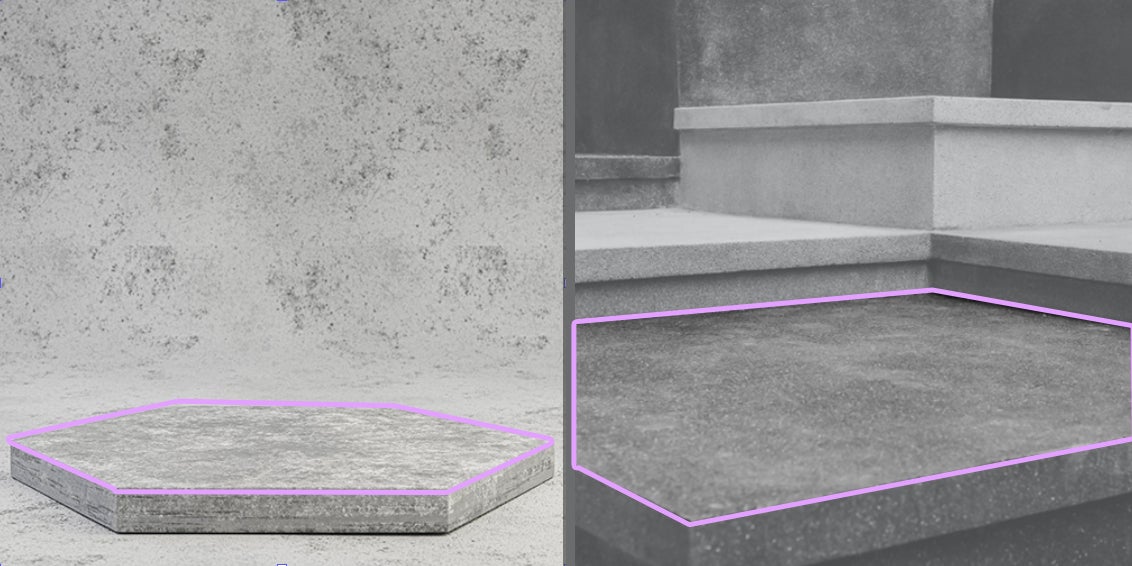
In order for the product photo to appear natural, the car itself must be adjusted and resized to align with the surface of the scene. If the car is not properly aligned with the scene’s surface, it will look out of place.
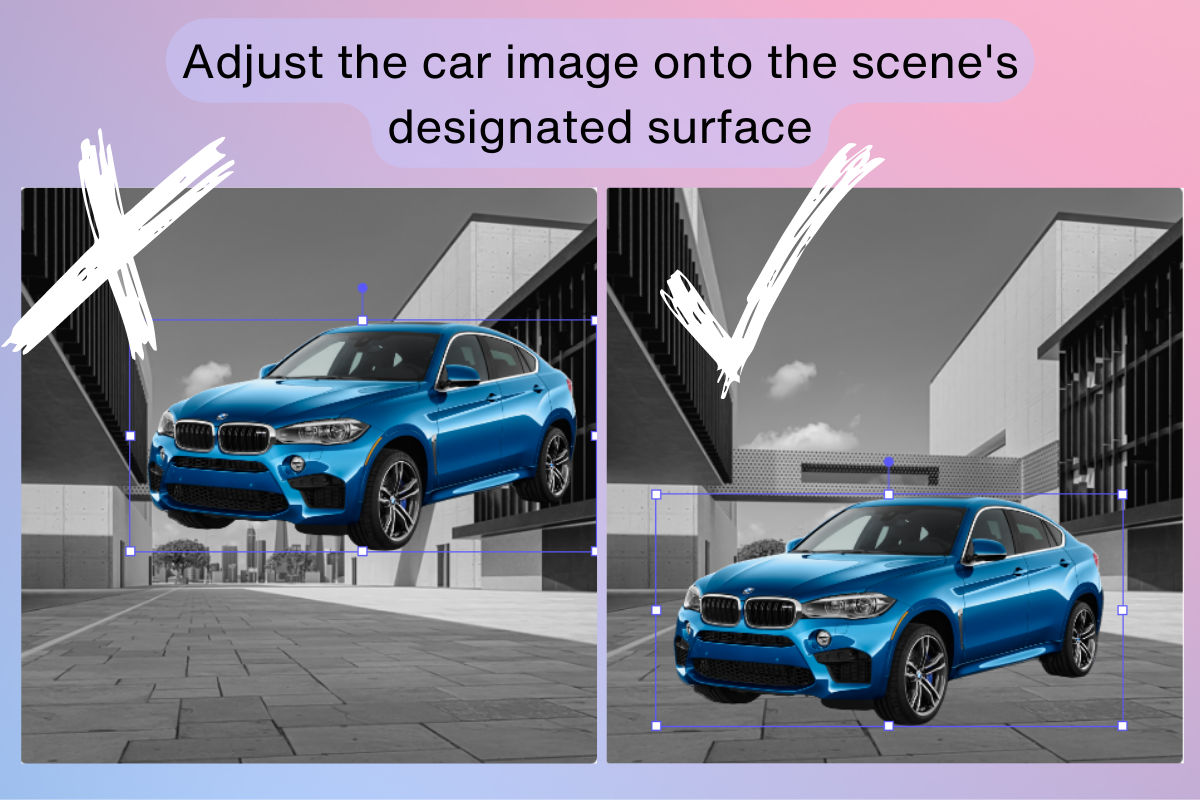
Depending on the angle of the car photo, the image needs to be aligned with the scene so that it looks natural and can fully fit onto the surface. In the example above, to the left is an example of not aligning the car with the scene surface, whereas the alignment to the right shows the correct way of inserting a car image into the scene.
Size is also an important aspect of car images, as well as, product photos as a whole. Resize the car image to have it fit into the scene without looking unnatural and out of place.
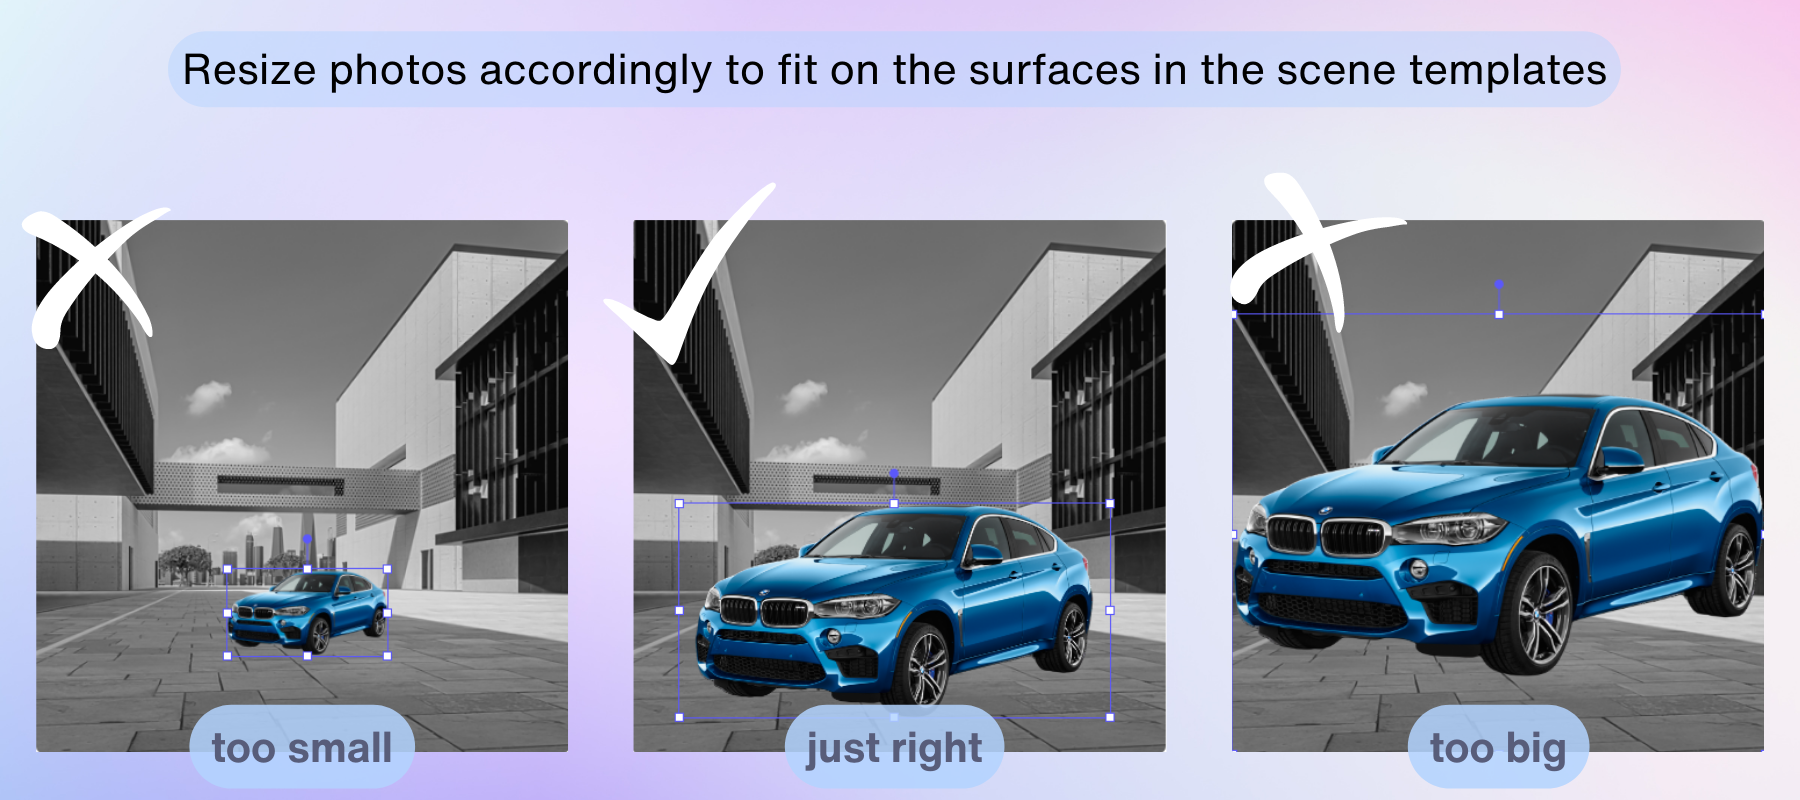
💡Pro tip: Each eCommerce platform has its own ratio for padding. Find the ratio of padding for the platform you’re looking to post the product image to and adjust your image on the AI Photoshoot template according to this ratio.
Trial and error is a big part of working with not just AI Photoshoot, but AI-generated content as a whole. Try different scenes, resize your product image, and move it around the canvas to find a background where your product fits naturally.
Step 4: Write a Prompt
Working with AI Photoshoot text prompts is similar to using any other AI image generation tool.
While each AI image generator has its own nuances and may be functionally different, some prompt writing tips are more or less universally applicable.
Elements to include in-text prompt:
- Background elements - a park with picnic tables in the background, a cafe with tables and chairs in the background, a playground with slides and swings in the background;
- Time or lighting input - afternoon, morning, sunny weather, cloudy;
- Objects with materials - wooden table, marble countertop, brick wall, stone over;
- Image stylizations - professional photo, noir, impressionist, hyperrealistic, blur.
💡Pro tip: Do not include the product itself in the text prompt. For example, if you have uploaded an image of a blue BMW X6, do not write “blue BWM x6” in the text prompt.
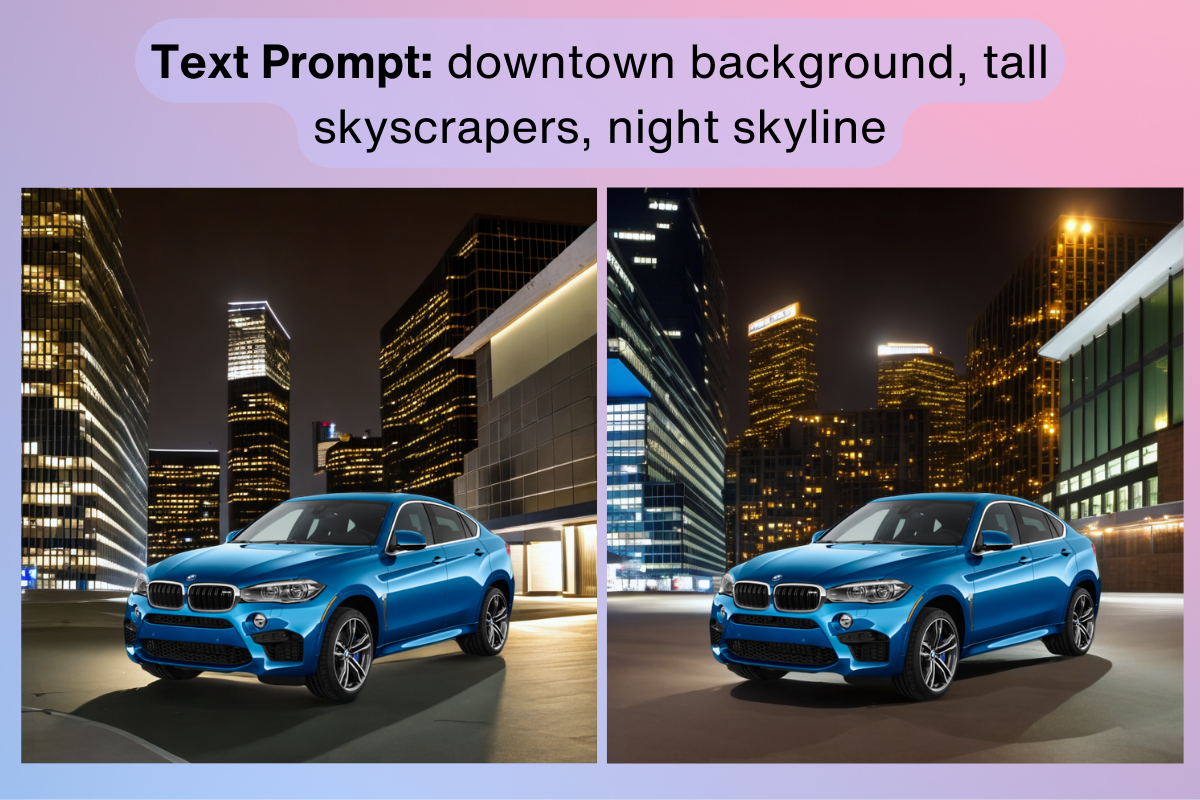
When typing out the text prompt, write it as you would describe the image. Try to keep sentences at least 4-7 words in length. The more descriptive your text input the better results you can expect to find.
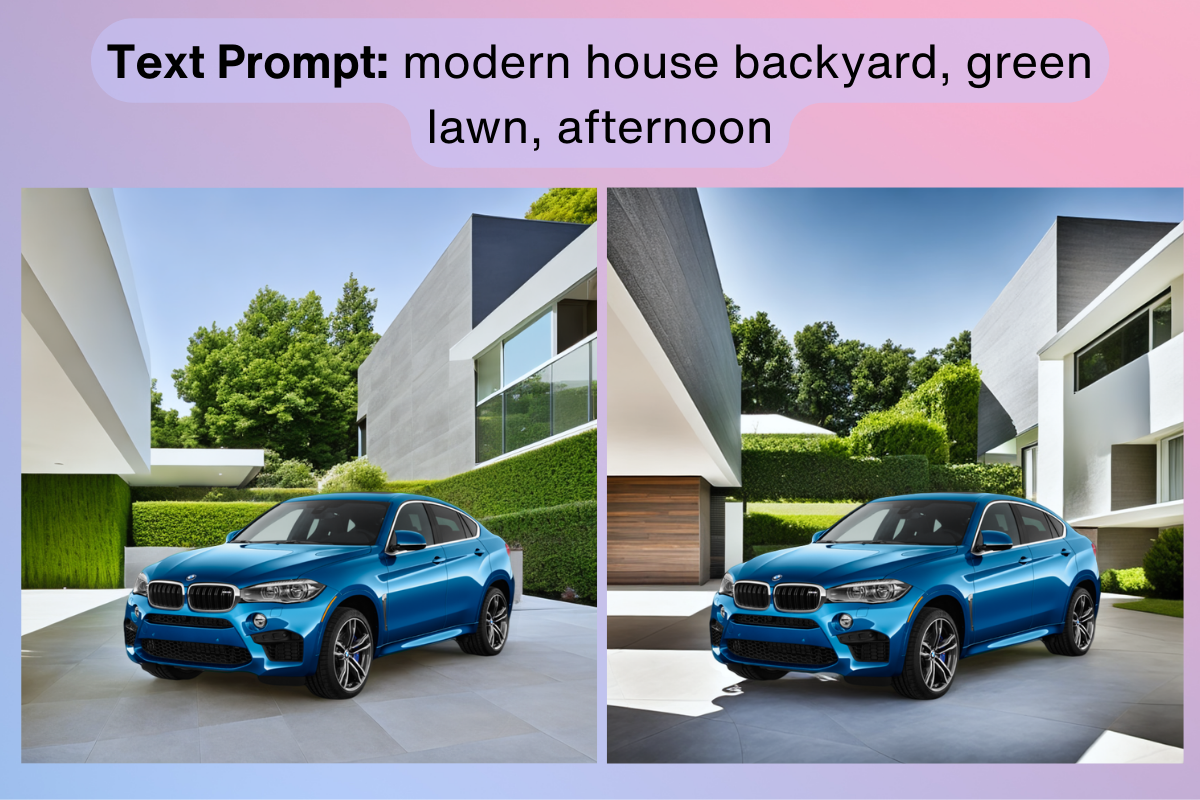
Write prompts to create backgrounds for your car image that will look organic. Safe bets, such as a “modern house backyard” or “luxury garage interior” are always a good option.
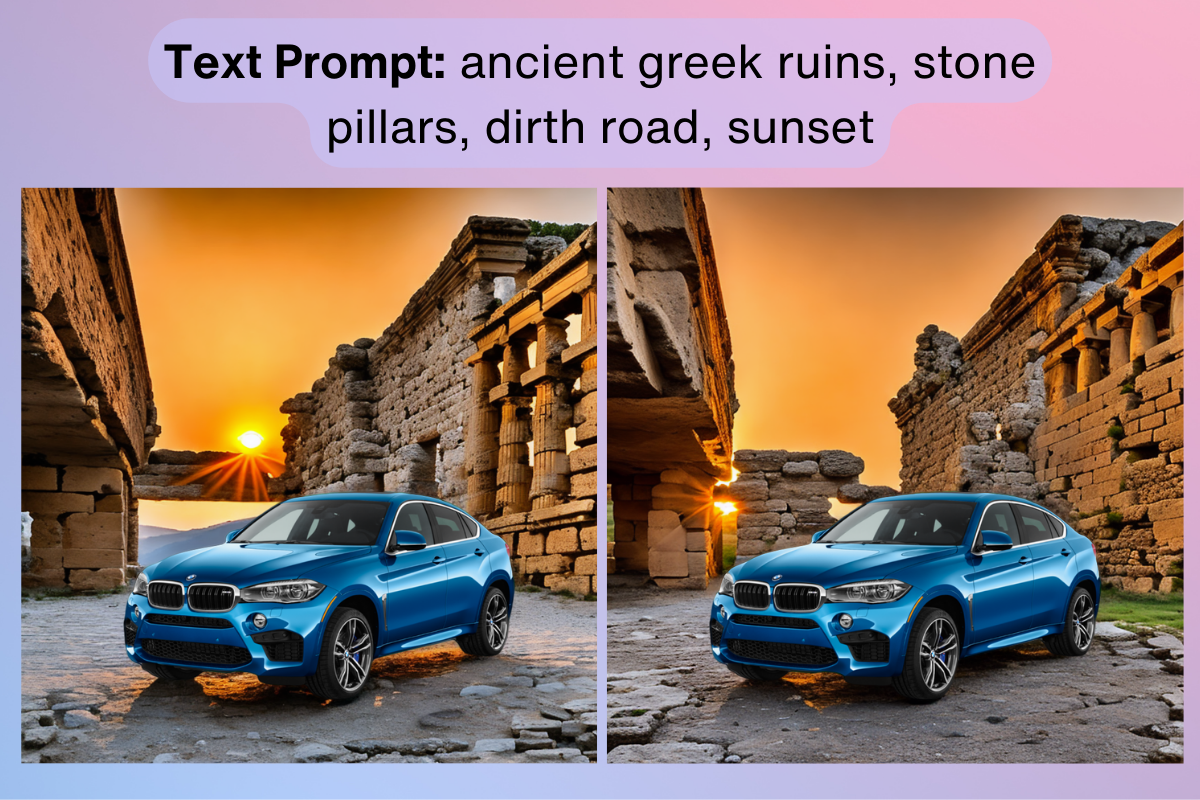
But the beauty of AI image generation is that you can render pretty much anything that comes to your mind, such as these Ancient Greek ruins. This gives your car photo a unique aesthetic, one that would be very hard to replicate in real life.
Leaving Text Prompt Empty
You also have the option of leaving the text prompt empty. What this means is that Scene Generation will create something more abstract based on the template.
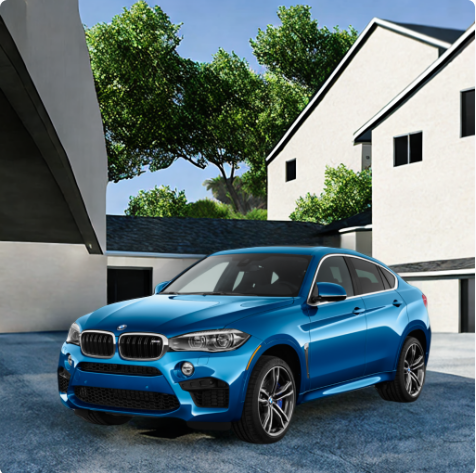
In this example, we did not use any text prompts or additional colors to edit this template. The AI Photoshoot AI itself decided on what the backdrop of this product image should look like. And while it is a more abstract and less detailed background in comparison to the previous ones created above, it can still work great if you’re looking to create a simpler backdrop to focus more attention on the car itself.
Step 5: Pick a Primary Color (Optional)
Though this step is optional since you can also provide color commands in the text prompt, using the color picker can be a very effective way of accentuating and emphasizing elements that will be included in the text prompt.
For example, if you were to make an arctic background, you would pick a light blue color that matches the text prompt's elements. On the other hand, if you were to write a prompt for the AI to generate an image of the Martian surface, a reddish hue would be a better choice.
Step 6: Generate and Download
After adding finishing adjustments to your AI-generated backdrop, you can click the Generate button to render the images. Regardless of the image complexity, it usually takes around 10-15 seconds to generate a batch of 4 backdrops for a single product image.
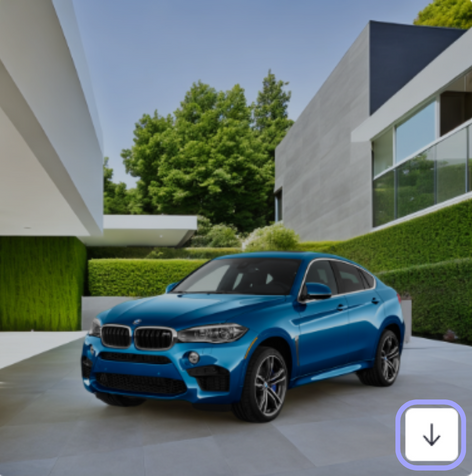
Choose one of the 4 generated images that match your expectations the most and click on the downward arrow button to download the image. Save it to your device then upload it to your eCommerce platform. It’s really as simple as that.
Benefits of AI Photoshoot In Car Photography
Here are the different ways that AI Photoshoot can give a helping hand with car photography for online marketplace usage.
Immediate Results - We live in a time when online presence is largely dictated by speed and how brands can be reactive in their content production. Part of what makes AI Photoshoot and other Claid.ai tools so useful is how fast they work. We’ve optimized and continue to optimize AI Photoshoot to deliver results as fast as possible, so you can have gorgeous product image backdrops in under a minute.
Easy to Use - A major advantage of AI image generation is how accessible it is to people with little to no experience in coding or visual design. With nothing more than a few words and sentences, you can create highly-detailed and professional product image backgrounds that would typically take months of learning and practice if you were to do it by hand.
Optimized for eCommerce - Car photography, and product photography in general, is a very tricky craft. It takes a lot of practice and experience to understand the elements that differentiate a good product image from a bad one. Luckily, AI Photoshoot has been optimized to product backdrops for product images that are suited for modern eCommerce standards.
Why High-Quality Car Photos Are Important
There are many benefits to using professional car photos for online listings.
Greater Visual Clarity - High-quality product images are not simply there for aesthetic or stylistic purposes. They serve the practical benefit of allowing potential customers to see details such as the quality of the material, threading, tailoring, small design features, etc. If prospective buyers can see these features, it’s easier for them to come to a decision much faster.
Improved Brand Perception - When it comes to brand impressions, especially in the automotive industry, a very visually-focused industry, nothing says “We care a lot about our product” like good visuals. Whether actively or subconsciously, buyers notice small details such as high-quality and consistent visual content and this improves their perception of your brand.
More Brand Visibility - eCommerce is a very highly competitive industry and in order for brands to stay relevant they must find a way to stand out. Putting extra effort into visual content is a great way to differentiate your brand and stand out from the competition.
More Visual Enhancements
For more AI-based visual enhancements, check out our products Claid.ai and Let’s Enhance.

Claid.ai
May 18, 2023