Tech
Professional jewelry photography made simple with AI Photoshoot


Jewelry product photography is all about light, detail, and reflection—and getting it right usually means expensive equipment, perfect lighting, and a lot of post-production.
The right tools change that. With our AI Photoshoot, you can create professional, studio-quality jewelry visuals in minutes using a single product image.
In this guide, we’ll show you how to make the most of AI Photoshoot, experiment with jewelry photography ideas, and build a gallery of visuals that look like they came straight from a luxury campaign.
How to create stunning jewelry images in AI Photoshoot
Here’s an easy-to-follow guide on creating jewelry product images with AI Photoshoot.
If you don’t have a Claid account, create one and navigate to Editing Studio → AI Photoshoot. You get 10 free generations to test it out.
Step 1. Upload your jewelry image
Start by uploading a clean image of your product.
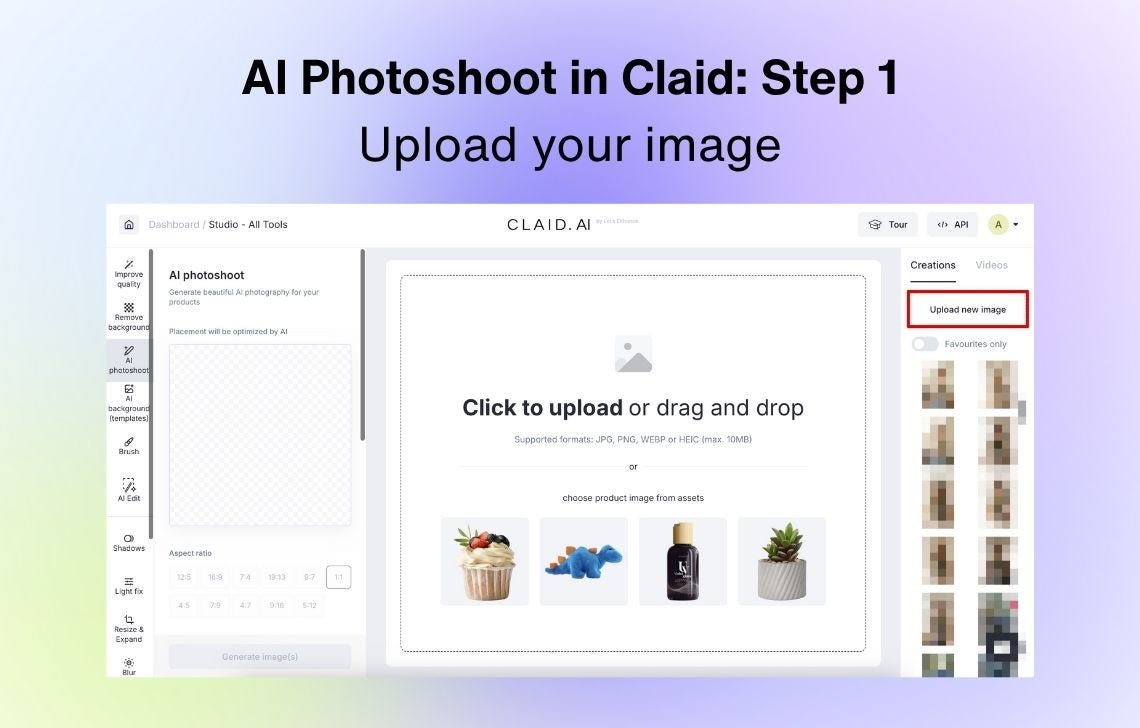
Some tips for getting the best results:
- Use jewelry product photos with a transparent background. If you don’t have one, remove it first using Claid’s Remove Background feature.
- Choose sharp, well-lit photos that show the product clearly. Reflections, stones, and metals look more natural when the source photo is crisp.
- Avoid cluttered or shadowy images. Clear contours work best for AI placement.
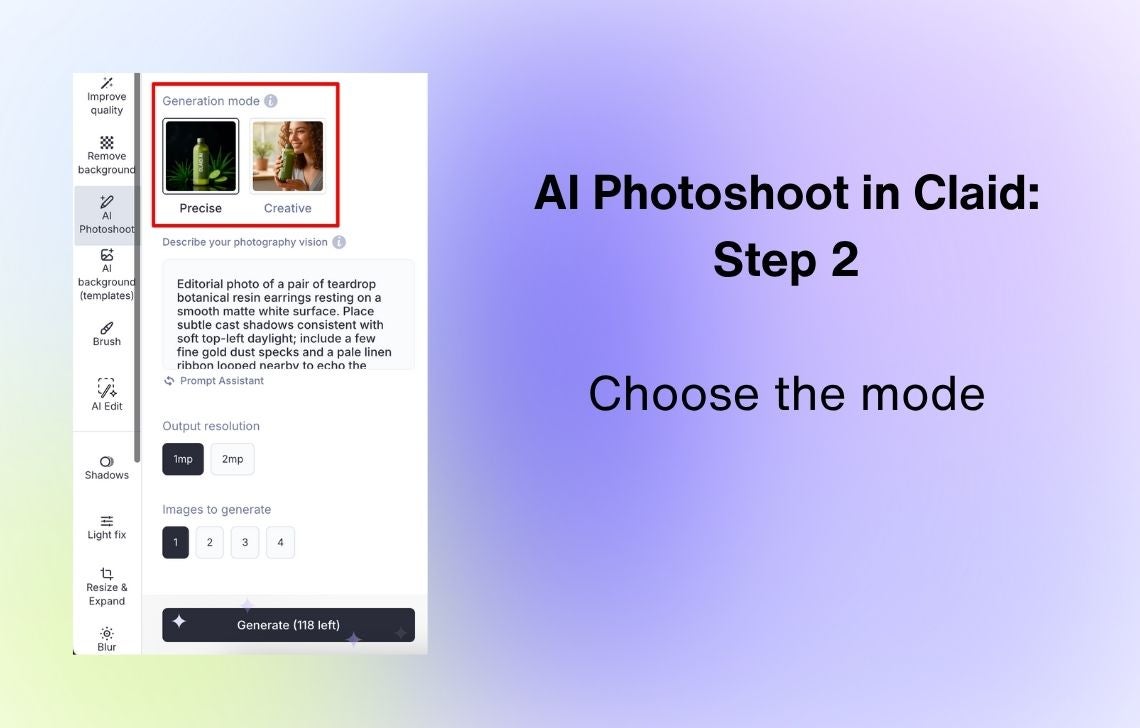
Step 2. Choose a generation mode
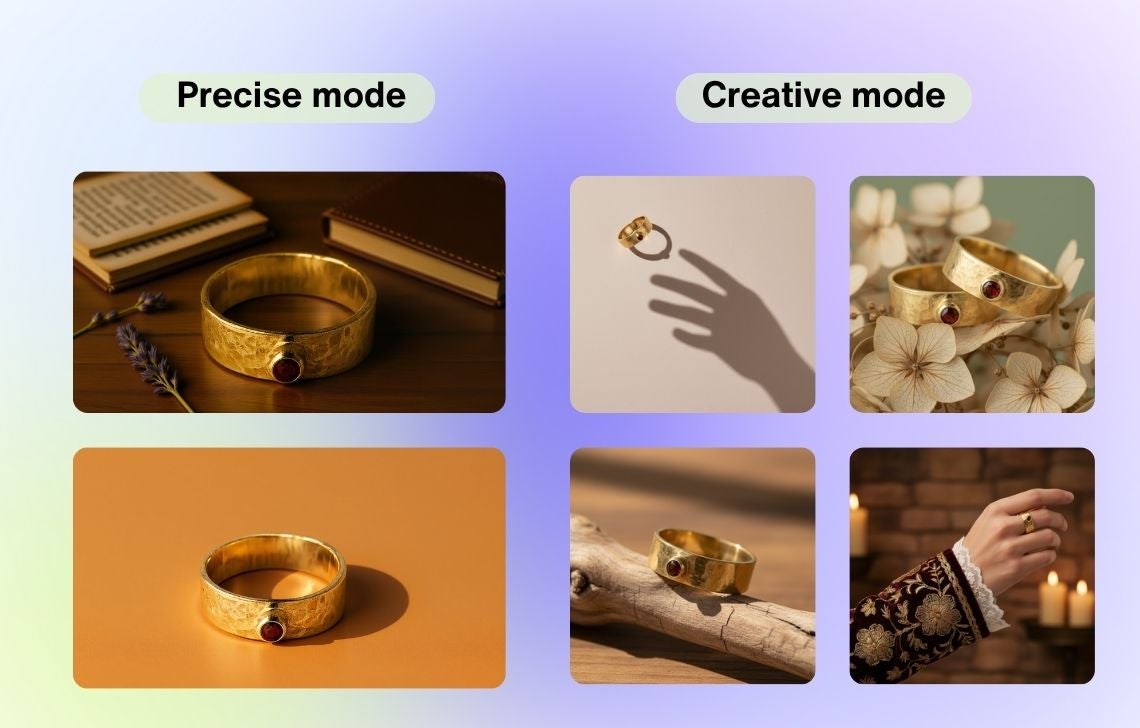
In AI Photoshoot, you can work in Precise or Creative mode.
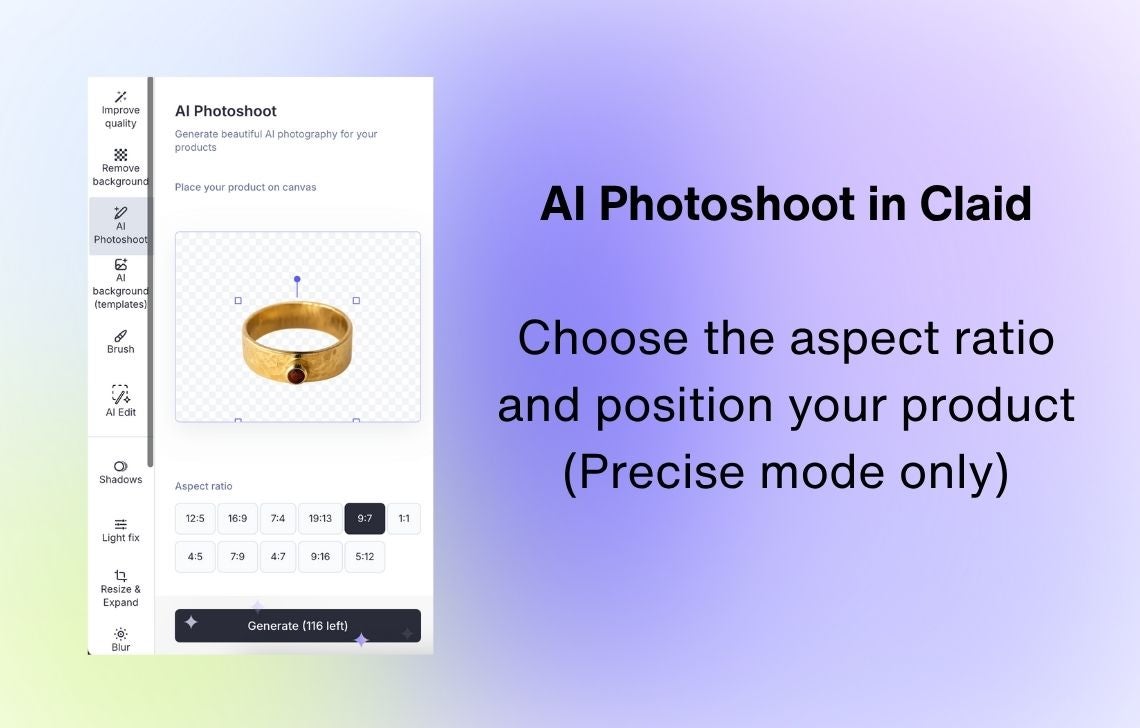
Precise mode locks your jewelry in its original position and angle. It’s ideal for:
- Marketplace or catalog photos that require specific image ratios
- Comparing product variants (for instance, gold vs. silver)
- Keeping proportions and reflections intact while changing only the background for jewelry photography
Creative mode gives you full freedom to experiment with creative jewelry photography ideas. It can change the product’s perspective, lighting, and angle to match your prompt. Perfect for:
- Showing jewelry on models or in lifestyle settings
- Creating mood-based visuals (luxury, boho, romantic, etc.)
- Experimenting with ad concepts
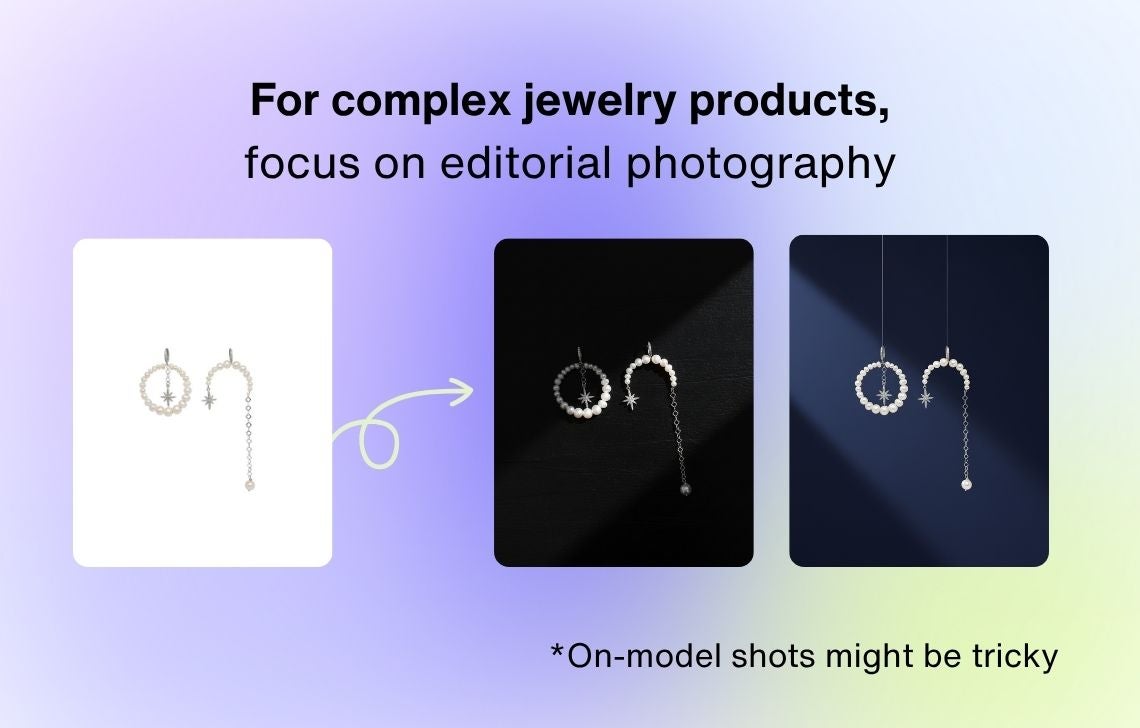
❗ Be careful with on-model placement. AI algorithms are not yet smart enough to understand complex jewelry, especially how different clasps or earwires work. With AI Photoshoot, focus on creating editorial photos that demonstrate your products from close up.
In the Precise mode, you can adjust the position of your product and choose an aspect ratio. While it’s not available in the Creative mode, you’ll be able to resize and outpaint your image with other Claid’s tools.
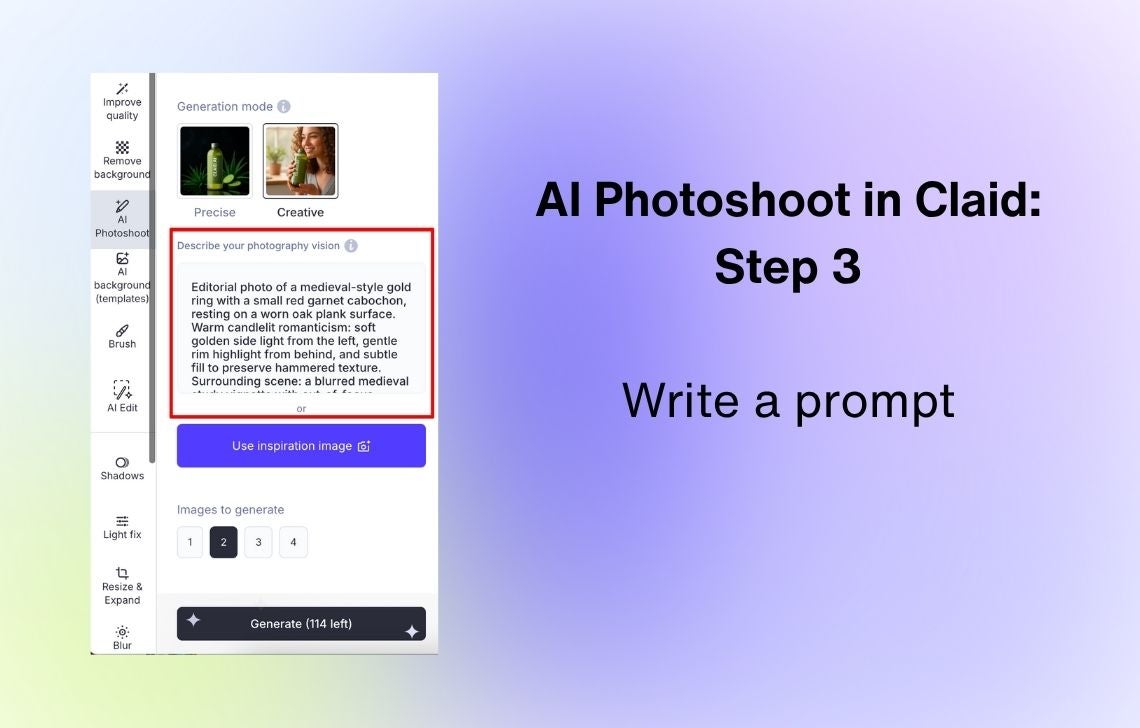
Step 3. Write a jewelry photography prompt
Your prompt tells the AI what atmosphere, setting, and mood you want. The more details you give, the more consistent and realistic the results will be.
Here are some smart prompt tips:
- Use Prompt Assistant if you’re not sure how to phrase your idea. It turns simple thoughts into full, effective prompts.
- Don’t describe the jewelry itself in the Precise mode. Focus on the background, lighting, and overall mood.
- Mention the style (editorial, luxury, romantic, vintage), lighting type (soft daylight, studio, moody shadows), and composition (flatlay, close-up, model shot).
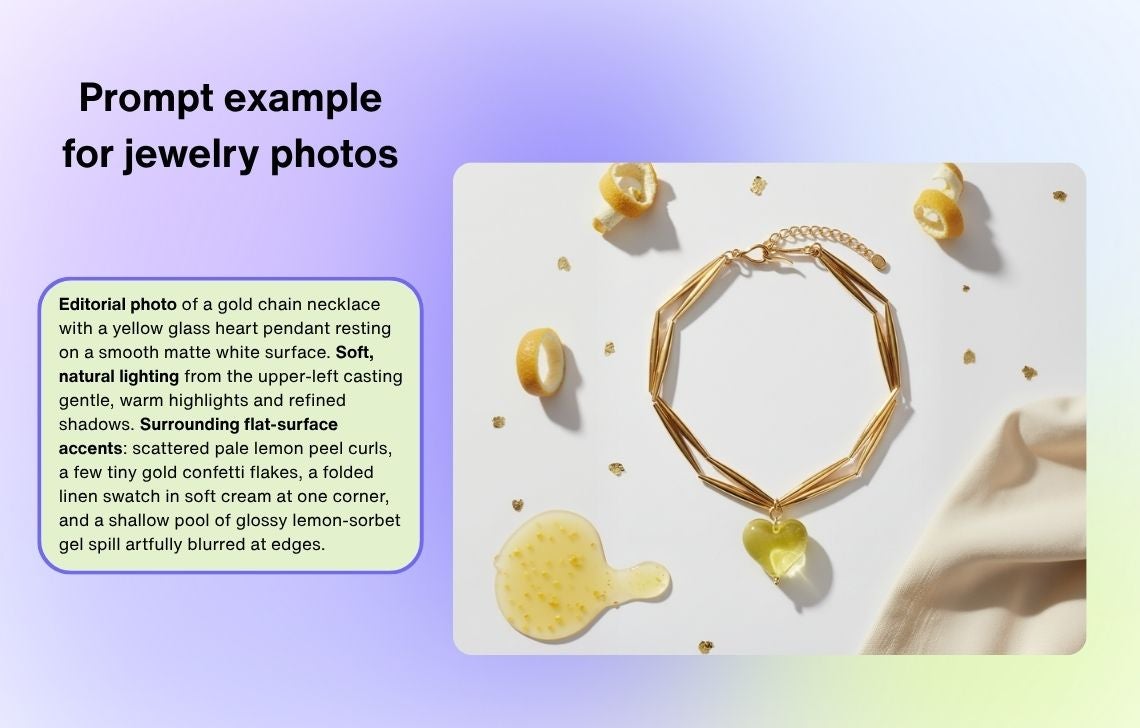
Want to reuse this prompt? “Editorial photo of a gold chain necklace with a yellow glass heart pendant resting on a smooth matte white surface. Soft, natural lighting from the upper-left casting gentle, warm highlights and refined shadows. Surrounding flat-surface accents: scattered pale lemon peel curls, a few tiny gold confetti flakes, a folded linen swatch in soft cream at one corner, and a shallow pool of glossy lemon-sorbet gel spill artfully blurred at edges.”
Get more ideas from our guide to product photography prompts.
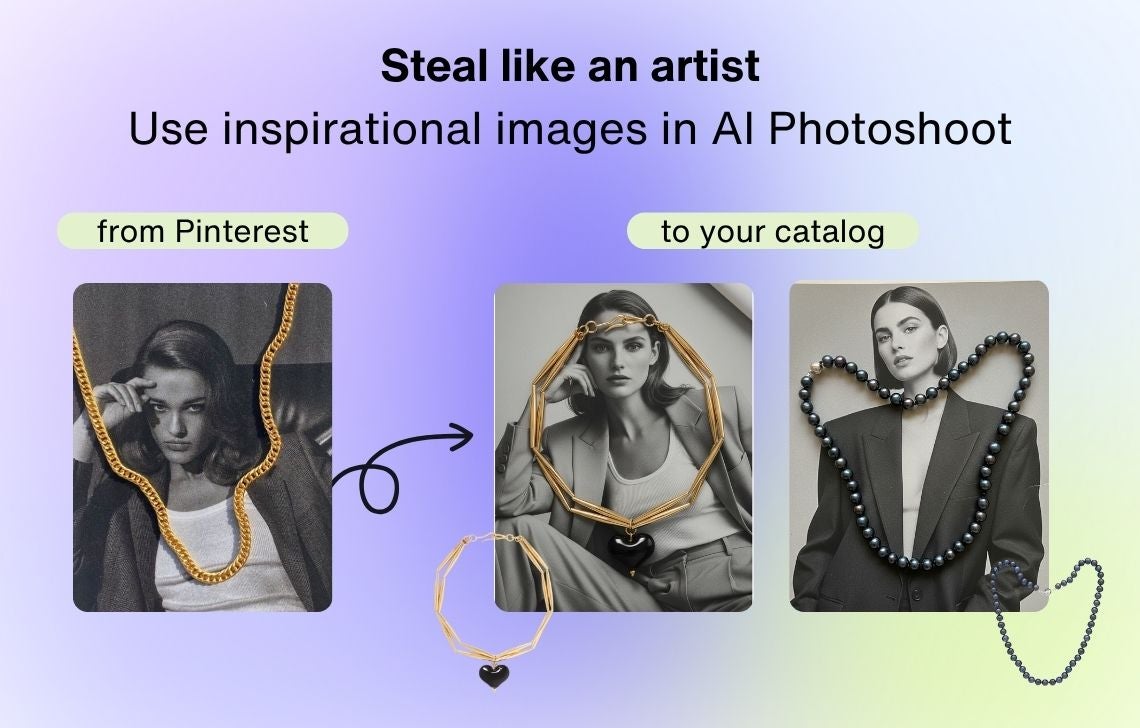
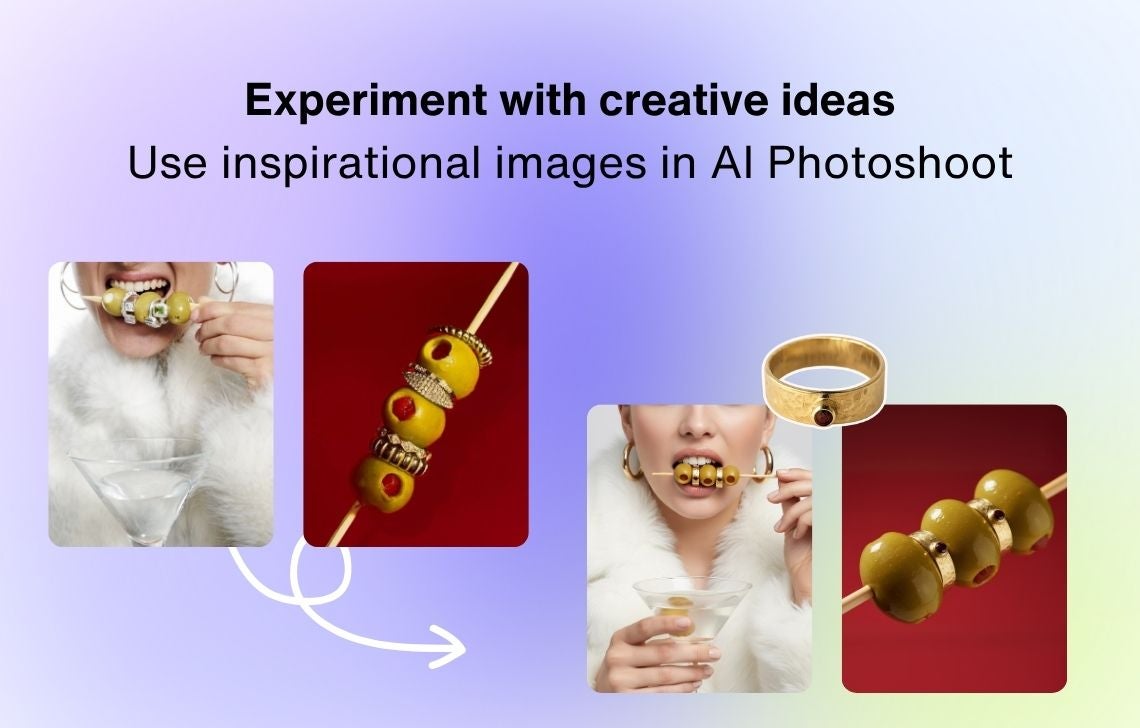
Or use a reference image
You can also upload an inspirational image instead of writing a prompt (Creative mode only). This is perfect for recreating campaign ideas or aligning new visuals with your brand’s previous shoots.
Use this option to:
- Recreate favorite luxury campaign looks
- Explore artistic or fashion-magazine-style setups
- Test bold jewelry photography ideas
Step 4. Generate images
When your setup looks good, choose the output resolution (available in Precise mode) and the number of images to generate.
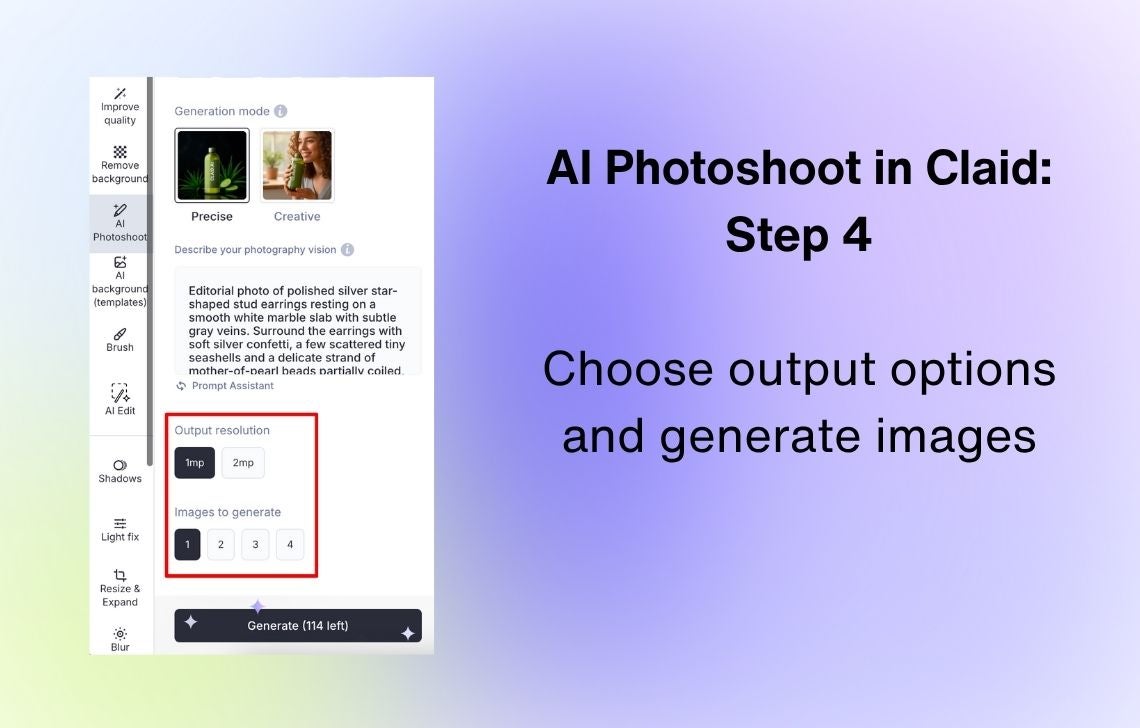
AI Photoshoot can create up to four variations from one prompt. Each image will share the same concept but have subtle differences (like lighting, texture, or angle) so you can pick your favorite or mix them for your campaign. Note that each individual image counts to your AI Photoshoot limits.
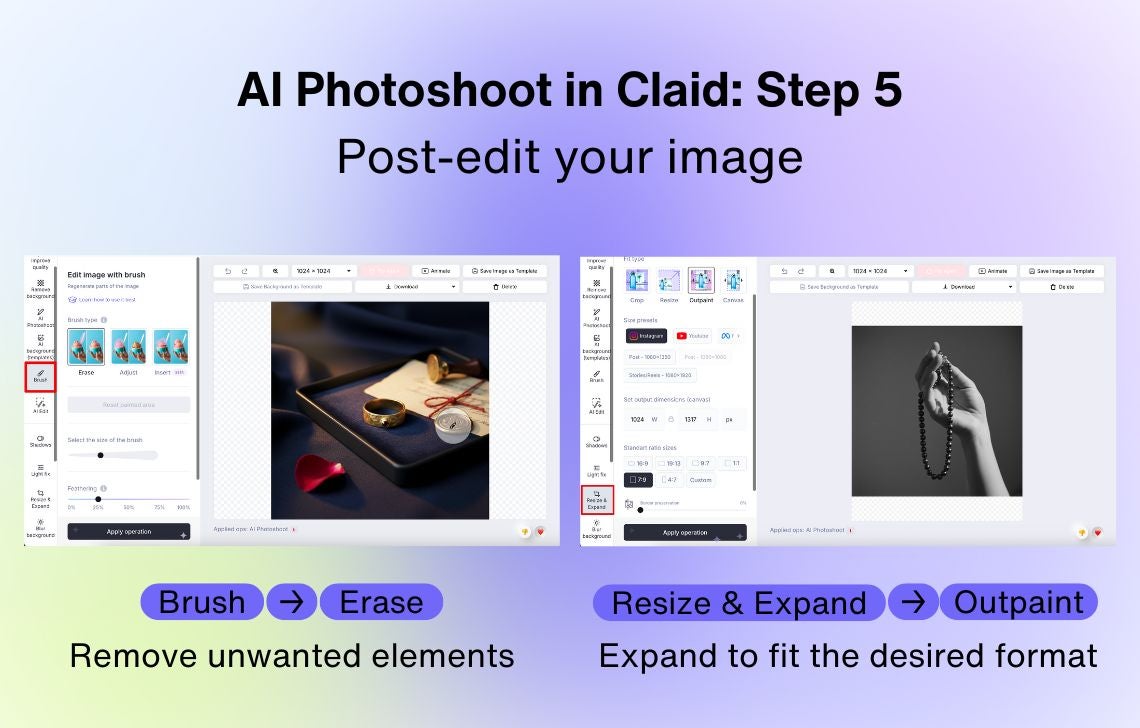
Step 5. Post-edit your jewelry photos if needed
Once your images are ready, you can refine them directly in Claid.
Here are the most helpful edits you can apply:
- Change the final size. With the Resize and Expand tool, you can adjust your visuals to fit social media formats or marketplace size requirements without cropping out important details.
- Remove unwanted elements. Use the object remover tool (Brush) to clean up any visual noise or imperfections.
Diverse, high-quality photos are a game-changer
Jewelry sellers—especially small, niche brands—often struggle with diversifying their product galleries and building creative campaigns to showcase their aesthetic and attract buyers. Real-life product photography takes a lot of resources.
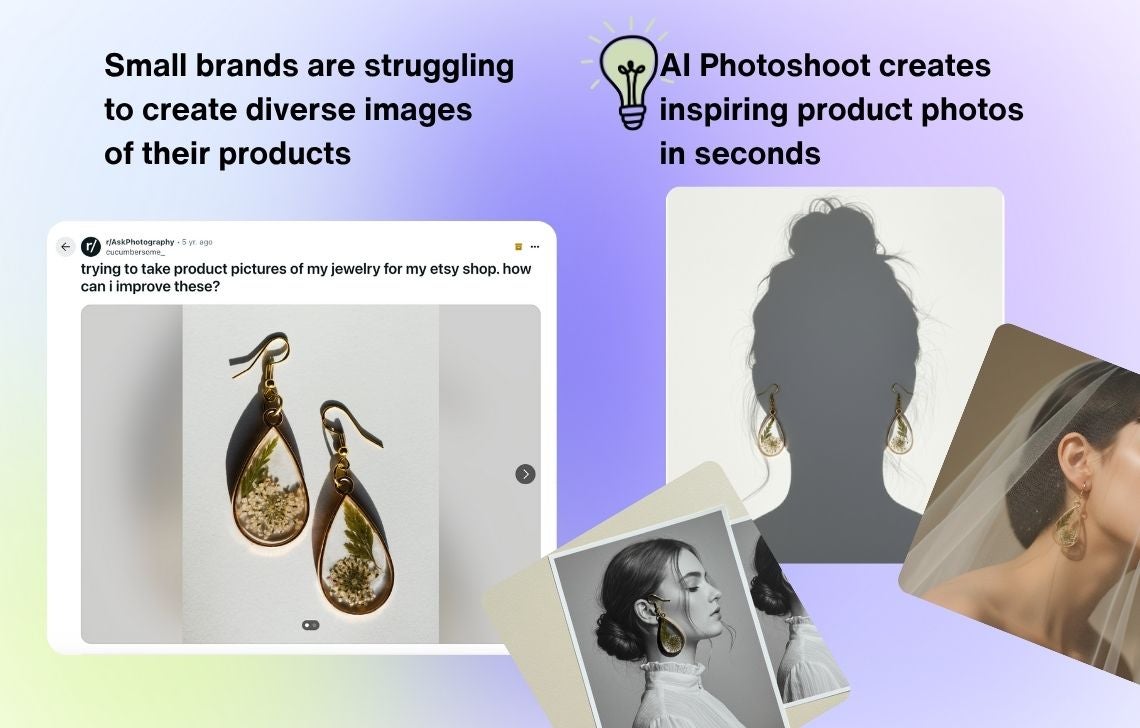
Whether you sell fine jewelry, handmade pieces, or bold fashion accessories, AI tools can help you experiment with angles, materials, and settings—all without touching a camera, buying lighting equipment, or hiring a team of professionals.
Here are the major benefits of AI jewelry photography tools:
- Helping customers understand scale. Rings, earrings, and pendants often look smaller or larger than they really are. Contextual photos (like jewelry worn on a hand or next to a familiar object) instantly solve that problem and reduce return rates.
- Getting stronger brand perception. With an AI jewelry image generator, you can create high-end visuals that look like they came from fashion magazines and experiment with bold visuals that channel your unique aesthetic and build a strong brand image.
- Maintaining consistency across channels. When your images are consistent in lighting and mood, your whole store looks more trustworthy and professional. You can also resize the same images in AI Photoshoot to instantly cover different needs (marketplace listings, social media campaigns, printed catalogs, etc.).
- Standing out from competitors. Many jewelry brands still rely on generic white-background shots. With an overabundance of jewelry background ideas and lifestyle images generated with AI can make your brand memorable and recognizable across platforms.
- Saving time and money. Skip the logistics of booking a studio, hiring a photographer, and waiting for edits. With tools like AI Photoshoot, you can generate polished, realistic images in seconds.
AI Photoshoot helps jewelry brands produce professional visuals that are diverse, consistent, and fast to make.
Ready to see the difference? Try AI Photoshoot today and create visuals that convert.
AI jewelry photography FAQ
Why do I need different jewelry product photos?
Because jewelry is highly detail-sensitive, customers want to see how it looks from every side and in real life. Diverse visuals increase trust and reduce returns.
How can I edit my jewelry photos?
One of the easiest and fastest ways is to use AI tools like Claid. In our editor, you can enhance lighting, remove backgrounds, resize, or expand jewelry photos.
How does AI help create jewelry photos?
AI simplifies jewelry product photography by automating complex tasks like lighting, composition, and retouching. Instead of spending hours on a shoot, you can test dozens of ideas instantly and keep your product imagery consistent across the entire catalog.
What kind of jewelry works best with AI Photoshoot?
All types: from minimalist silver pieces to ornate gemstone designs. Just start with a clear base image, and AI Photoshoot will adapt the context and mood around it.
Can I show jewelry on a model using AI?
Yes. The Creative mode lets you add AI-generated models to showcase your jewelry in context. However, it might not work correctly with complex products. For instance, if it’s hard to understand how the clasp works from your original image or you have a product with asymmetrical parts (asymmetrical earrings), we recommend focusing on flatlays and other editorial ideas instead of generating on-model shots.
Need this at scale?
Process thousands of images via API, or let our team handle it for you.


Claid.ai
October 30, 2025