Tech
How to Automatically Remove Image Backgrounds with Claid


Claid allows you to remove image backgrounds automatically and at scale. From this guide you'll learn how removing backgrounds from product photos can increase engagement on your digital marketplace and how to choose the best settings for the task in Claid Studio, a simple UI for using and testing Claid.
What are the benefits of having consistent backgrounds
Plain backgrounds, along with standardized image dimensions and margins, make up consistent product imagery.
Take a look at the image below.
Digital marketplaces that ensure image consistency (the layout on the right) increase buyers' purchase intent by 10%.
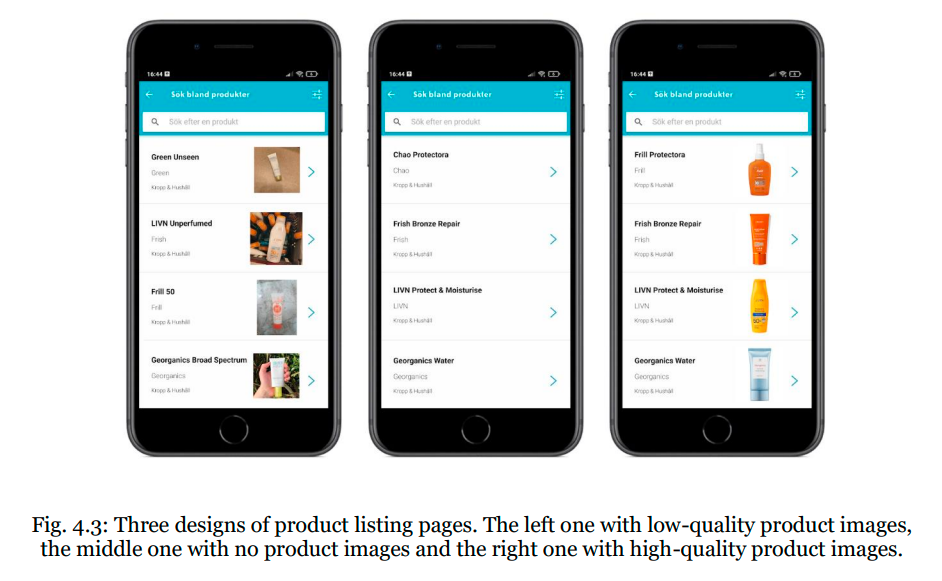
This also makes your platform appear more trustworthy and strengthens your brand by giving customers extra reassurance and the perception of quality.
How to remove backgrounds in Claid: a step-by-step guide
To follow the steps below, you need a Claid Account. If you don't have one, sign up with your work email here: https://claid.ai/signup.
You'll get 20 free images upon registration to try Claid for free.
Note: Claid is optimized to handle large volumes of images. If you need to process up to a couple of hundred images a month, consider trying LetsEnhance.io.
Step 1: Log in to your Claid Account and go to Claid Studio
After you log in, navigate to Claid Studio on the left sidebar or follow this link: https://claid.ai/studio/
Claid Studio allows you to:
- Customize the image editing pipeline to exactly fit your requirements (eg you can combine background removal with quality enhancement)
- Experiment with different operation setups
- Enhance images without any coding with just a few clicks
- Copy auto-generated JSON snippets that help your developers quickly launch automated editing
Note: For the best experience, please use Claid Studio from your computer or tablet.
Step 2: Upload an image or use a URL
You can upload a file from your computer or paste an image link.
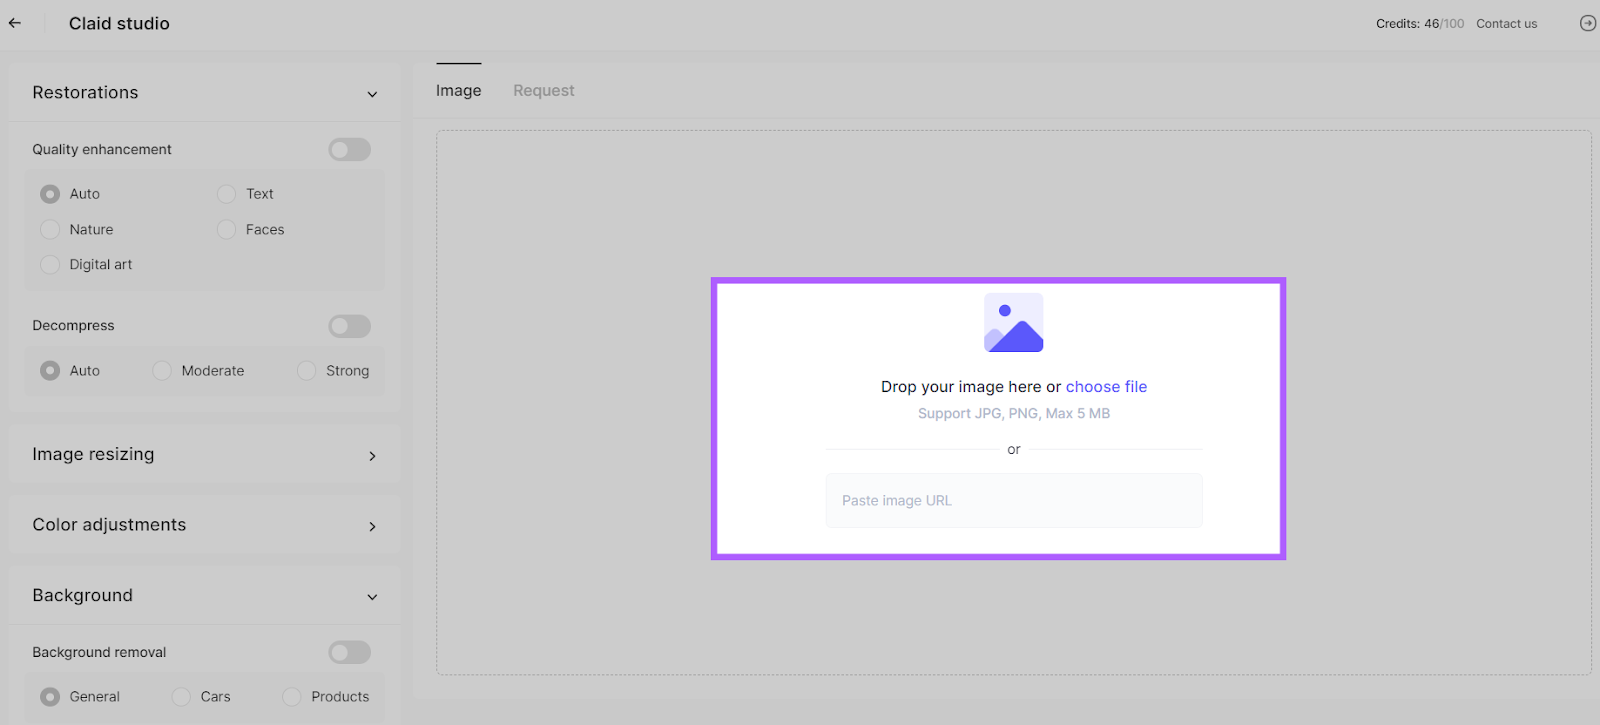
Claid supports the following image file types as inputs: jpeg, jpg, png, tiff, webp, avif, bmp, gif.
For other formats, you can use a converter, such as Convertio, first.
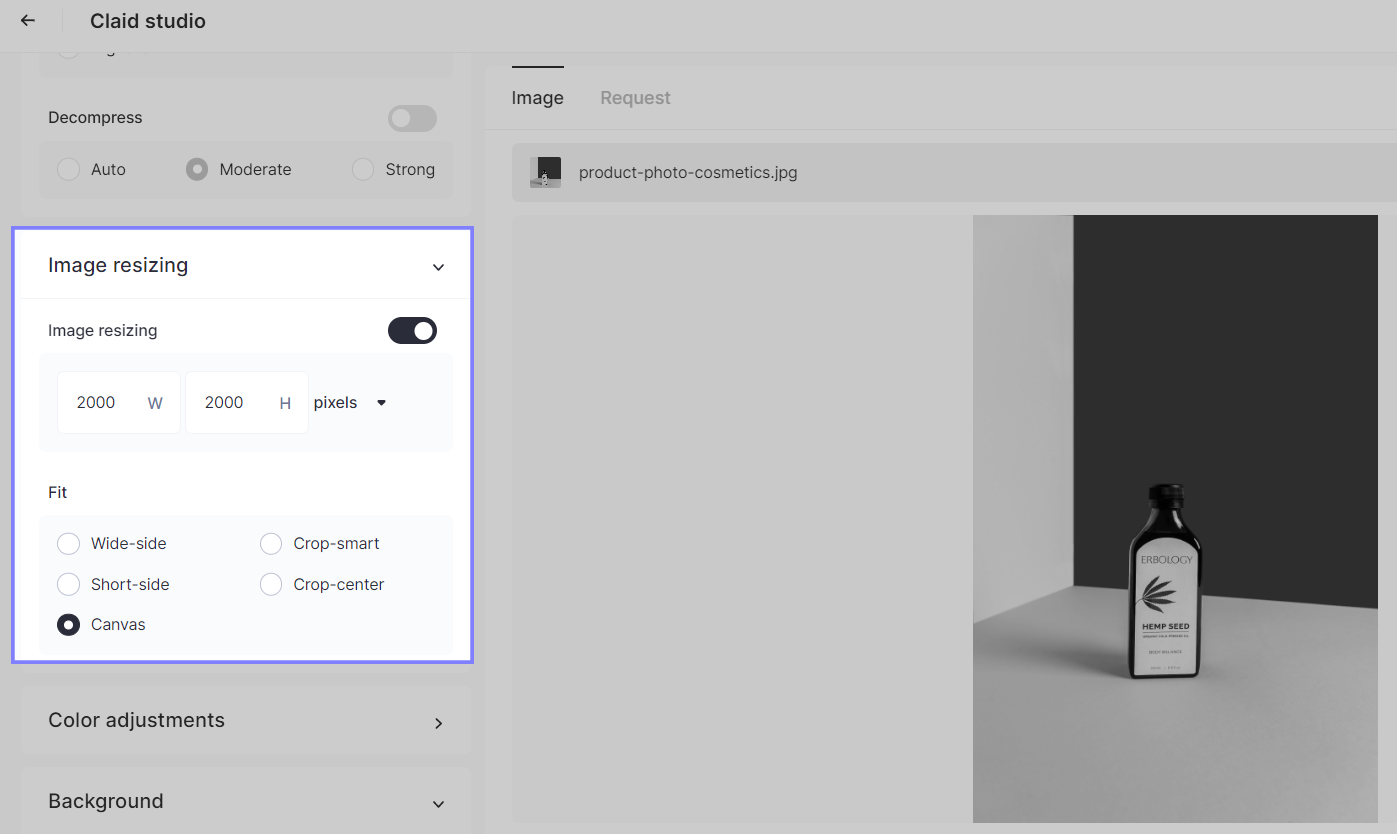
Step 3: Define the size of an output image (optional)
Note: Skip this step if you don't need to change image dimensions.
Claid allows you to transform images on the fly and make them fit aspect ratio and resolution requirements.
Let's say, you want to get an image that is a 2000 by 2000 square, which is in the range of typical eCommerce image guidelines.
For this, do the following:
- Toggle on Image resizing
- Set the required resolution to 2000 (make sure it's set to pixels and not percentages).
- Set the Fit option to Canvas.
You can also control what part of the canvas the object will fill (eg. 70%, 90%, etc.). We'll cover the padding setting below.
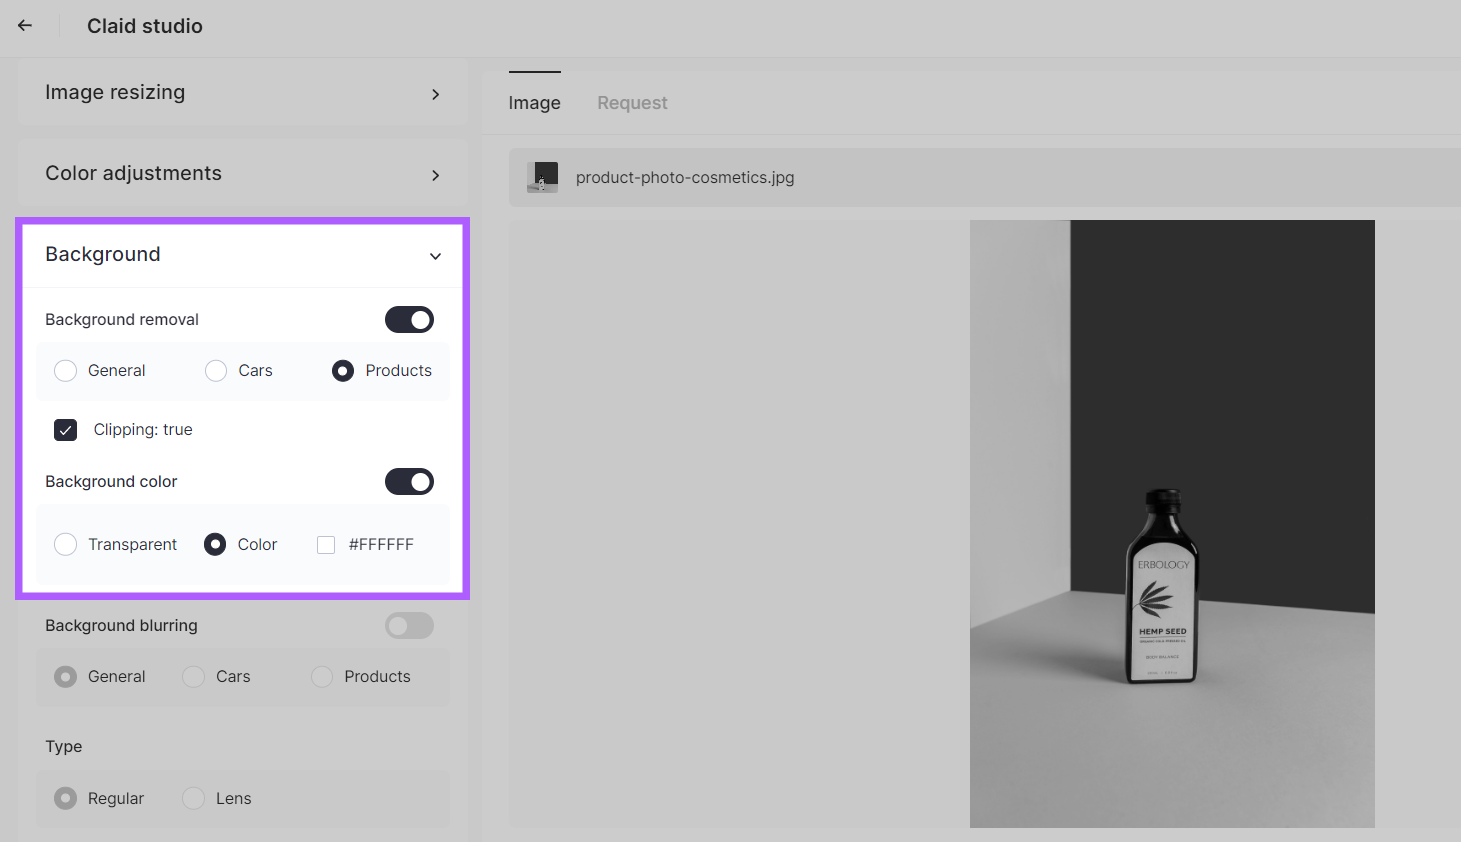
Step 4: Turn on the Background removal
- Switch on the Background removal toggle.
- Choose the category (in our case it's Products).
- If you're going to change the canvas size, click the checkbox Clipping: true. It allows you to change the size and the proportions of the canvas by adjusting the padding.
Tip: If you've picked the General category, and the result was inaccurate, try processing your image with Products selected instead. It can work better than General with objects that don't necessarily fall into the product photography category.
Step 4: Choose a background color or make it transparent
White color is a default one but Claid allows you to choose any background color in the hexadecimal spectrum.
Tip: Colors affect buyers' behavior differently. But the key is to keep it consistent across all listings on your website.
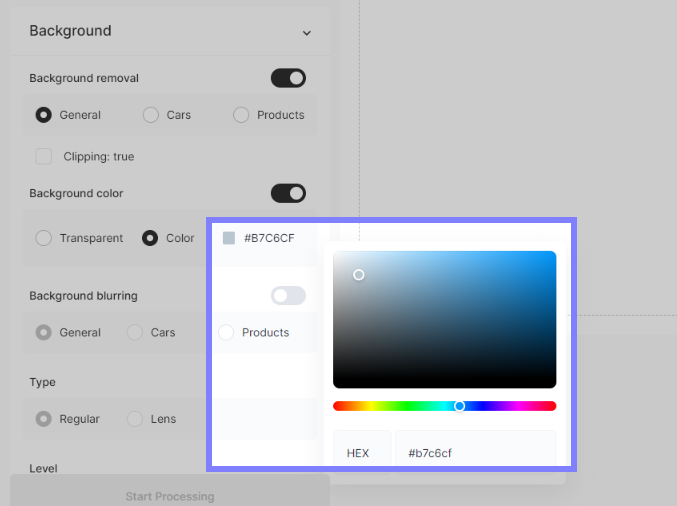
Alternatively, you can also make the background transparent. In this case, make sure to set the output format to PNG.
Step 5: Set up the padding
Padding defines the amount of space around the object.
In Claid, you can set the General value which will be applied to all of the image's sides.
Safe zones allow you to set the horizontal and vertical padding separately.
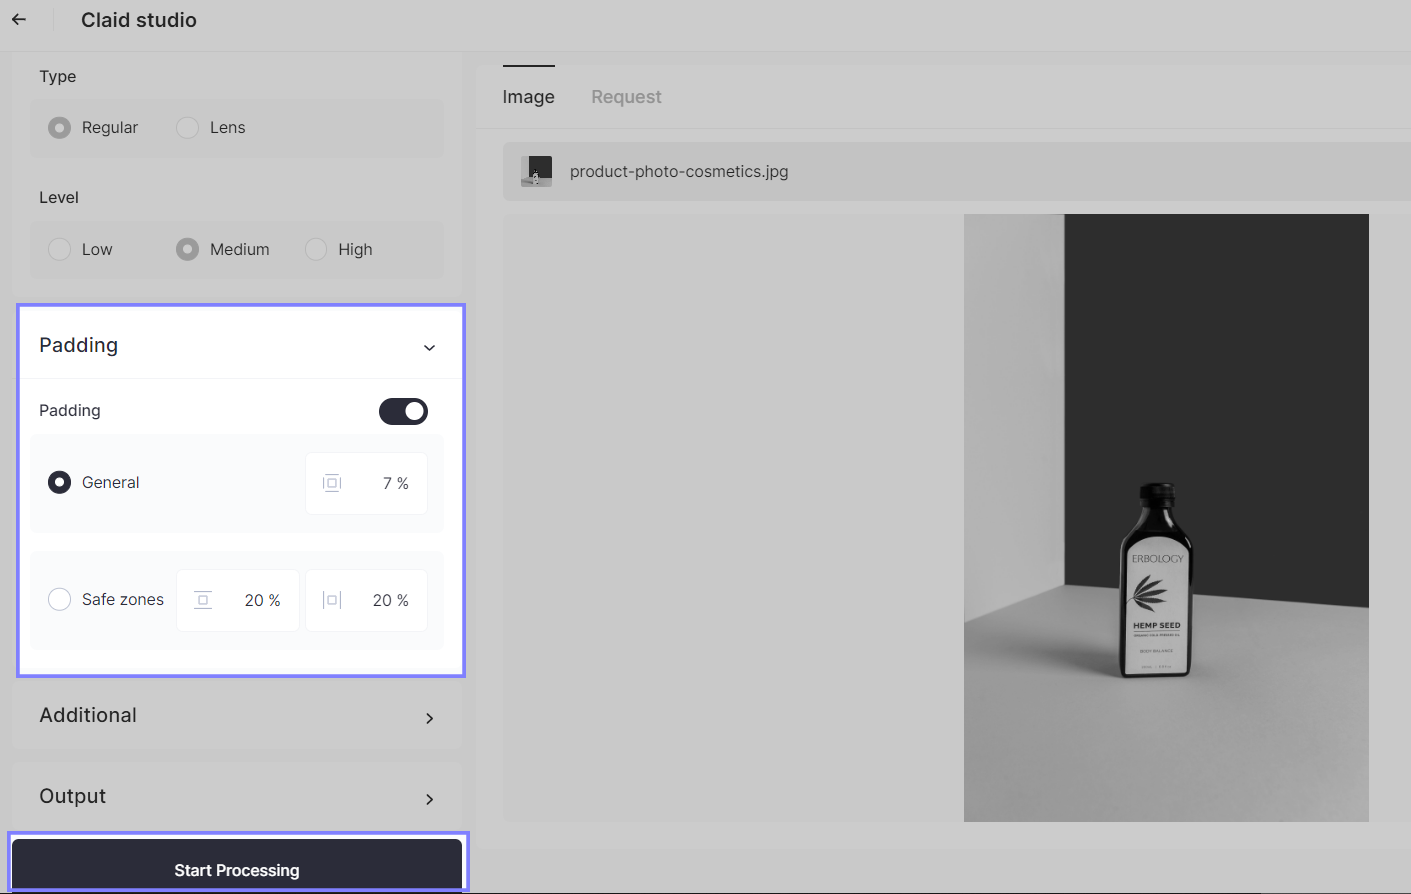
Tip: We recommend picking a value in the range from 5 to 10%. This will make the product fill from 80 to 90% of the canvas, respectively.
Step 6: Click Start Processing and check the results
When you finish setting up the editing pipeline, click the Start Processing button.
In a few seconds, Claid Studio will show you the result.
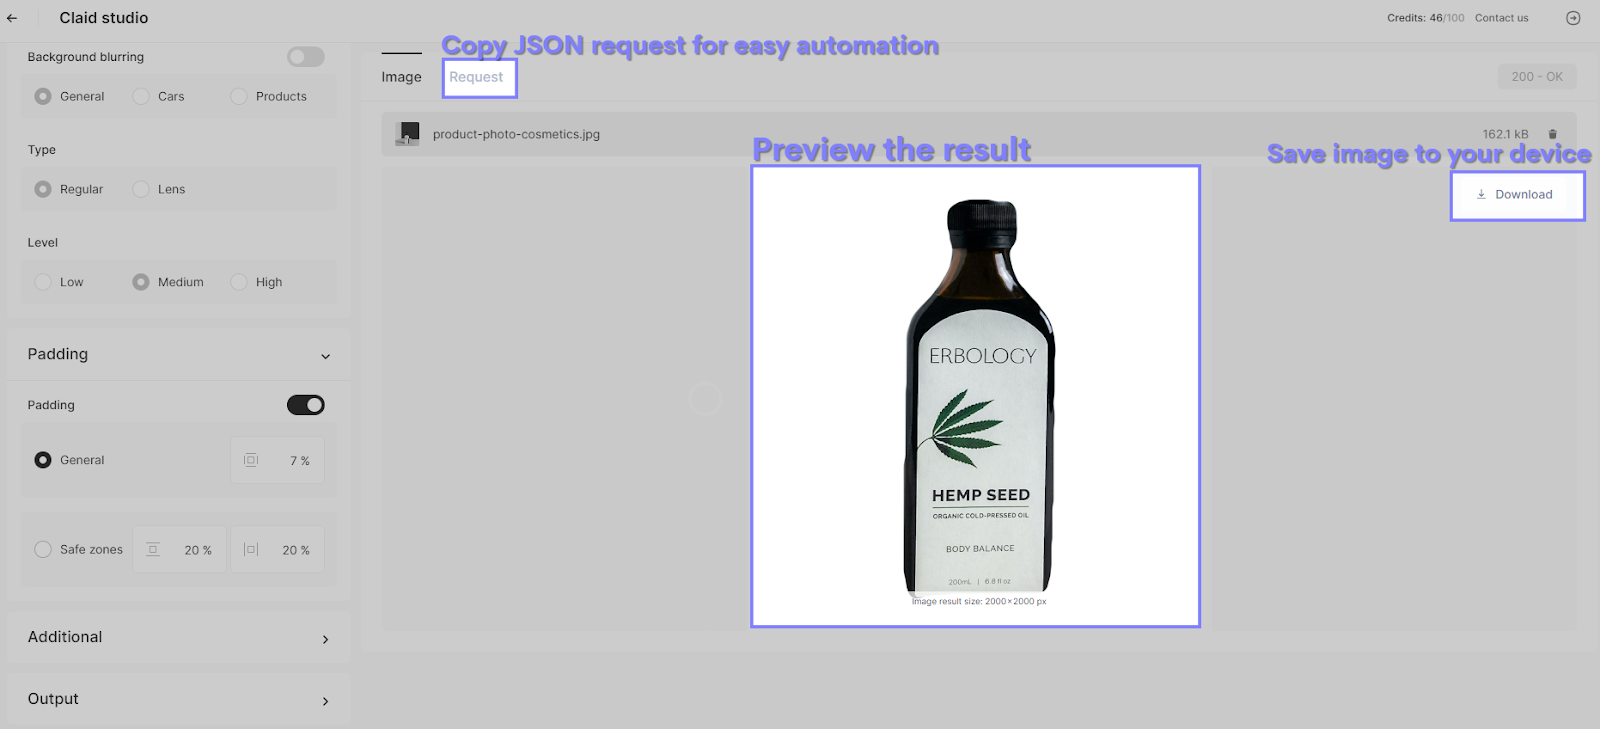
We encourage you to experiment with different settings before automating the editing process. After running a few manual tests in Claid Studio, you'll be able to copy the settings that you liked best for automating the editing process from start to finish.
Automate the background removal at scale
Claid Studio automatically builds the JSON code when you configure the editing settings. No programming skills are required.
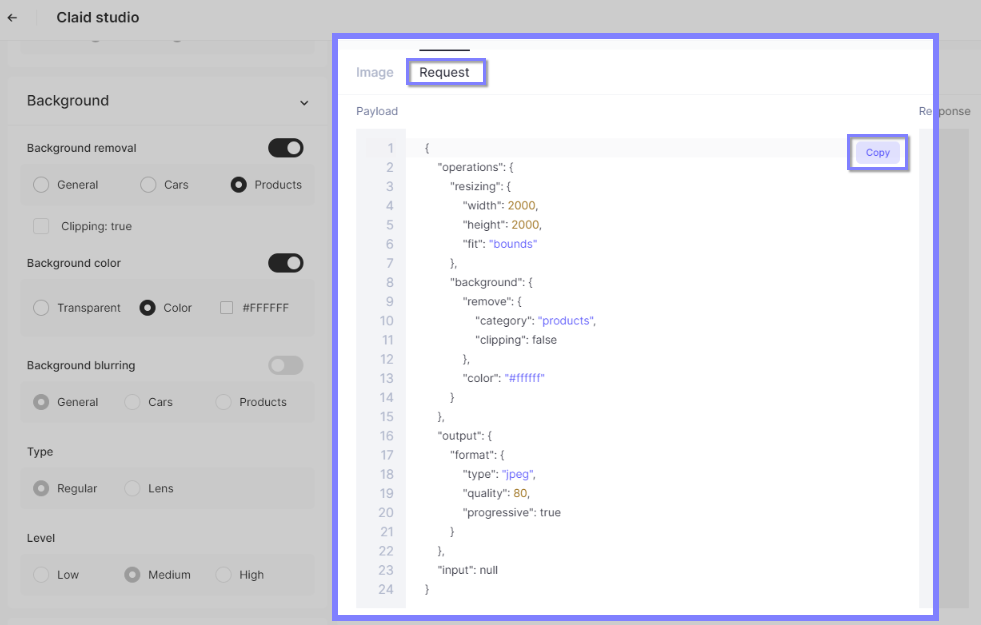
When editing parameters are set, your engineers can simply copy this code from Claid Studio. It allows you to quickly set up the image automation that requires no manual work.
For more technical descriptions, check out our docs for developers:
Start with 20 images for free
It's crucial to come up with the best settings possible before taking them to large-scale automation. That's why our new users get 20 free images to test Claid and refine the editing pipeline. Just create an account with your work email and try our powerful image AI yourself.
Need this at scale?
Process thousands of images via API, or let our team handle it for you.


Claid.ai
August 22, 2023