Tech
How to make AI product photos: 5 AI Photoshoot modes explained


AI Photoshoot now includes 5 generation modes, each designed for a different level of control and creativity. Some are well-suited for clean editorial shots, while others let you test out impossible scenes and locations. Some help quickly create product line images with the same background, while others help turn a source of inspiration into catalog-ready photos.
If you’re not sure which one to use, we’ve prepared a quick breakdown of the differences between them and a deeper dive into what each mode does and how to use it right.
5 AI Photoshoot modes: brief comparison
AI Photoshoot gives you 5 modes, each built for a different job.
- Precise keeps your product’s angle and placement fixed for clean editorial shots.
- Creative reimagines the entire scene, letting you experiment with new angles, environments, and storytelling.
- Inspiration follows the look and feel of a reference image to match a specific mood or campaign.
- Backgrounds swap only the backdrop while preserving the original photo.
- Mockups keep the whole scene intact but replace the product inside it.
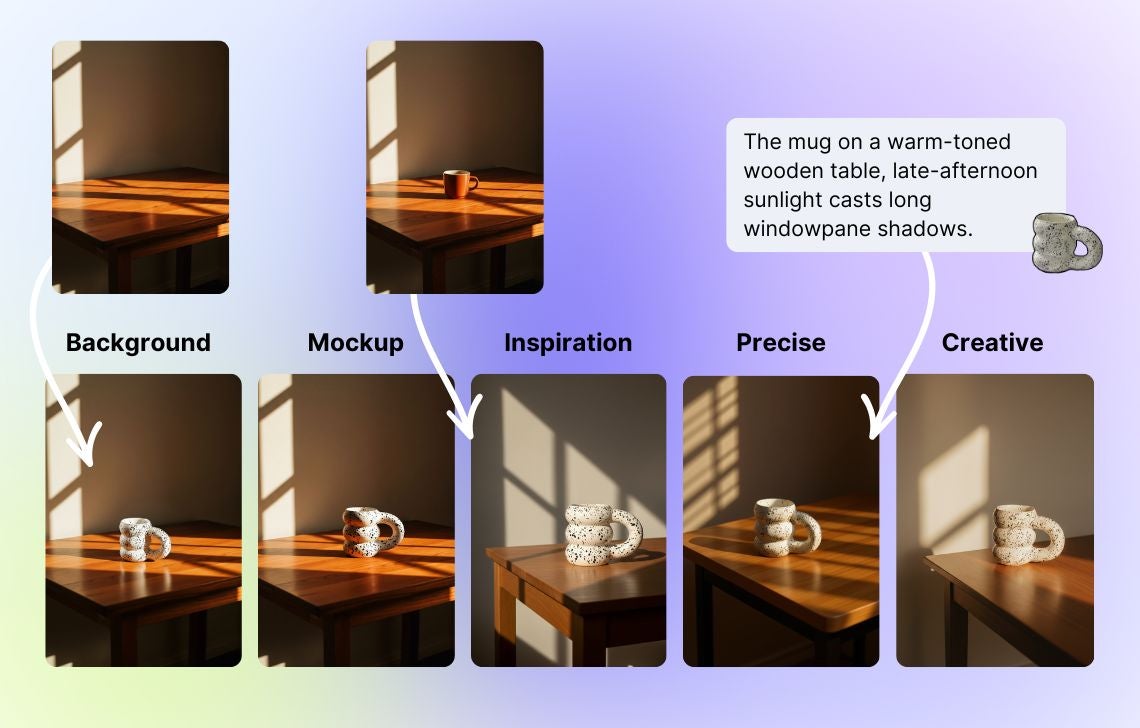
Here’s how each mode works on a simple idea with a coffee mug. We used the same image in Mockup and Inspiration, deleted the product on this image to use it in Background mode, and reverse-engineered the prompt from this image to generate photos in Precise and Creative.
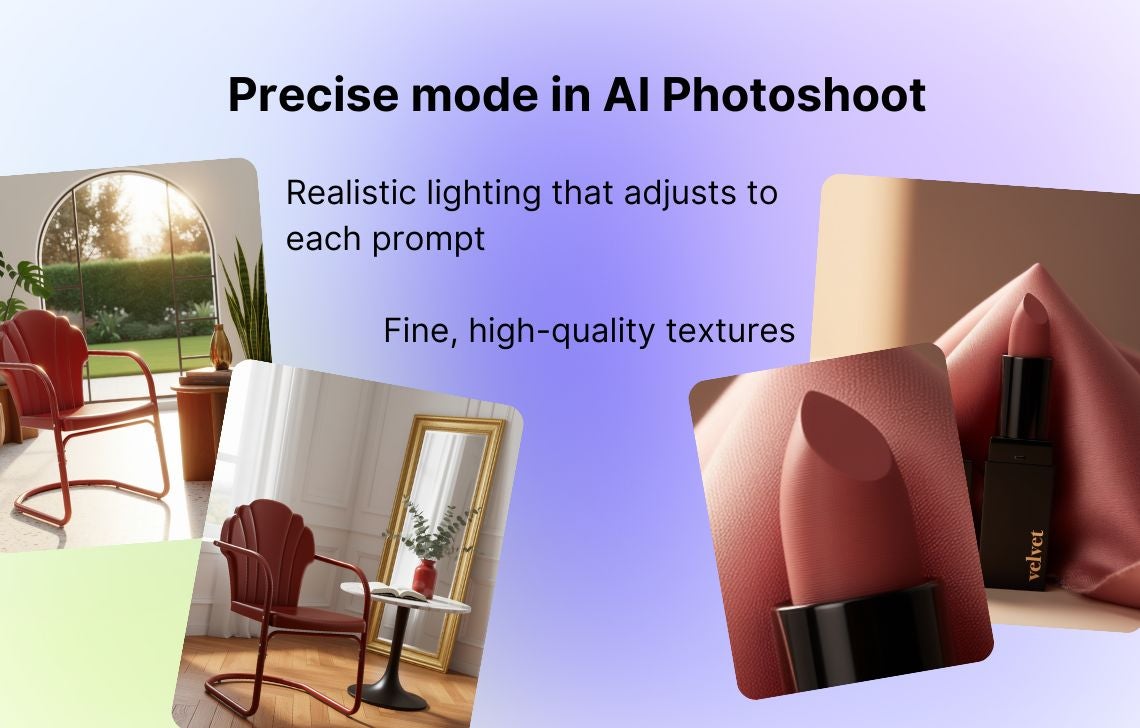
1. Choose Precise for full control and accuracy
Precise mode is built to keep your original product exactly as it is. You fully control the angle, proportions, and placement by “locking” the product on the canvas.
Once you choose the aspect ratio and adjust the position, write a prompt or use Prompt Assistant that will turn simple cues into a prompt. Then, our AI will generate clean, studio-quality images of your product.

Precise mode is perfect when you need predictable results for product pages and catalogs. It allows you to demonstrate textures and details of your product in high quality.
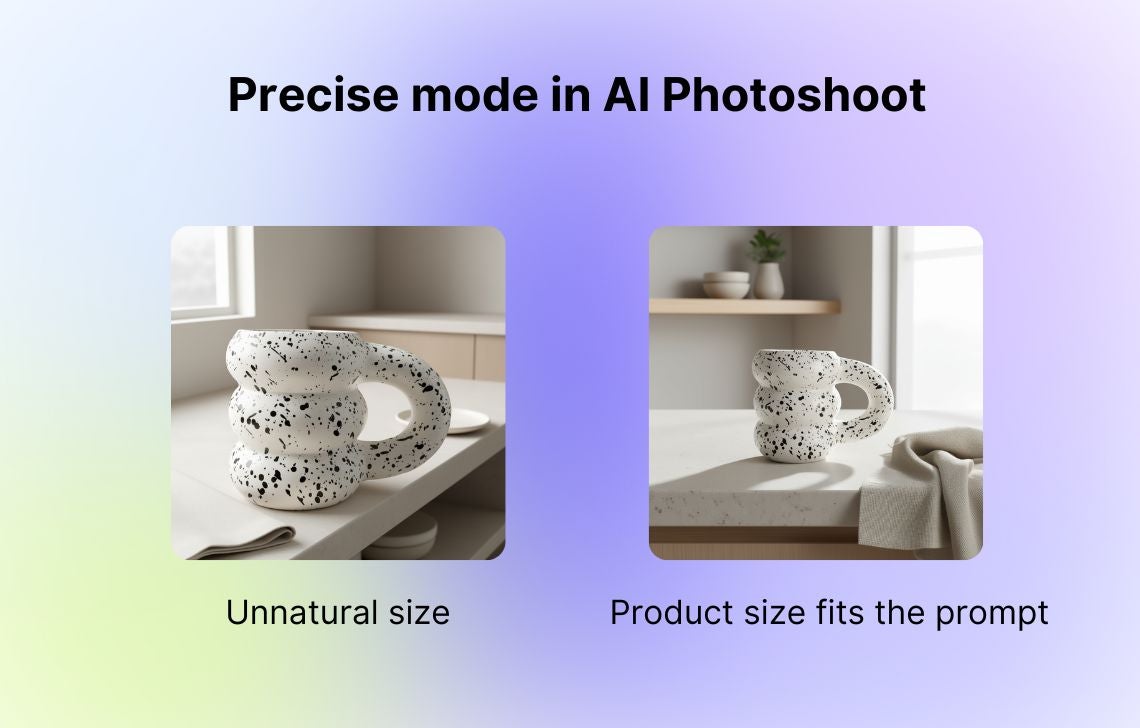
Pro tip: If you describe the interior and props in the prompt, make sure that the size of your product on the canvas corresponds to this description.
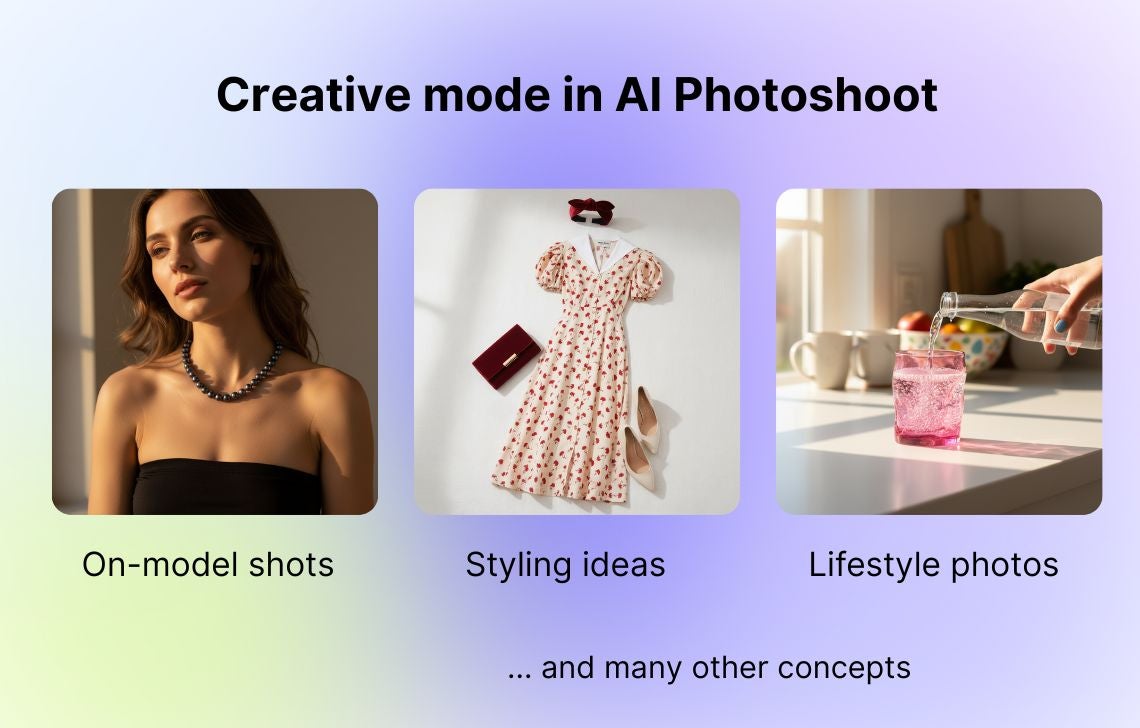
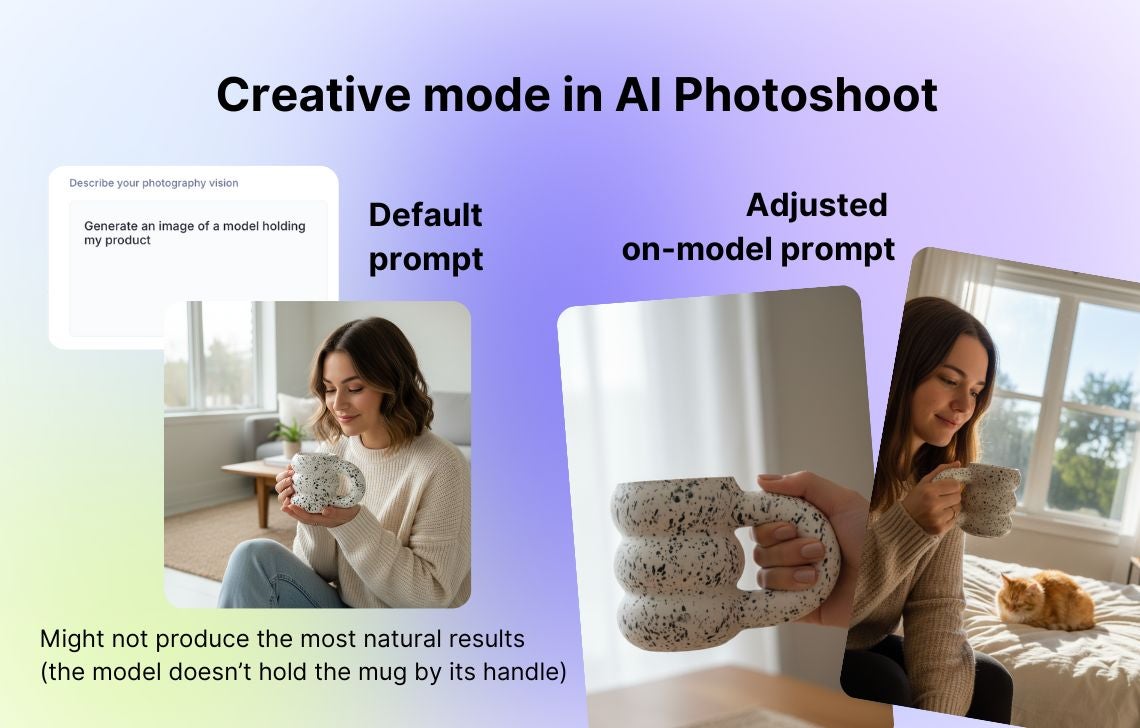
2. Choose Creative for experimentation
Creative mode is built to try out different concepts, including the wildest ones, which would be hard to set up in a traditional production. You can fully rethink your source photo and create new angles, new environments, and new moods to demonstrate your product.
In this mode, you can also choose the final aspect ratio, but the proportions and placement of your product will be decided by AI based on your prompt.
Creative mode is great when you want to explore ideas, test campaign looks, or add storytelling to your product images. It will help you generate lifestyle photos and on-model shots without hiring actual models and setting up locations.
Note: AI Photoshoot works great with apparel, especially jewelry, shoes, and other smaller categories. But if you want to have more control over models and styling of your clothing pieces, explore our AI Fashion suite. This tool will help you create professional photos with virtual models.
Pro tip: Speaking of on-model shots, Creative mode has a default prompt that asks AI to generate an image of a model holding the product. You can start from there, but make sure to slightly adjust the prompt so that the model holds the product in the most natural way.
3. Choose Inspiration to guide the AI
Inspiration mode is built to follow a specific visual direction. You upload a reference image, and AI reimagines the style and composition. It’s the easiest way to match past campaigns or recreate a particular look you love.
This mode can be your best option with complex compositions and unusual editorial ideas.
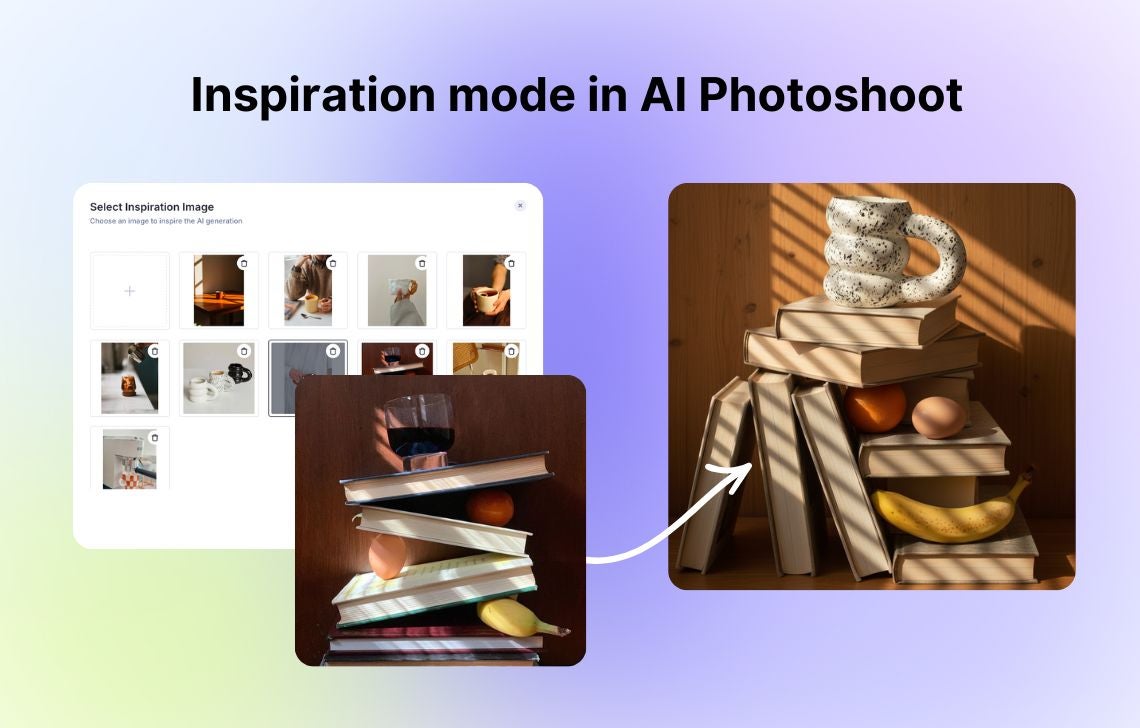
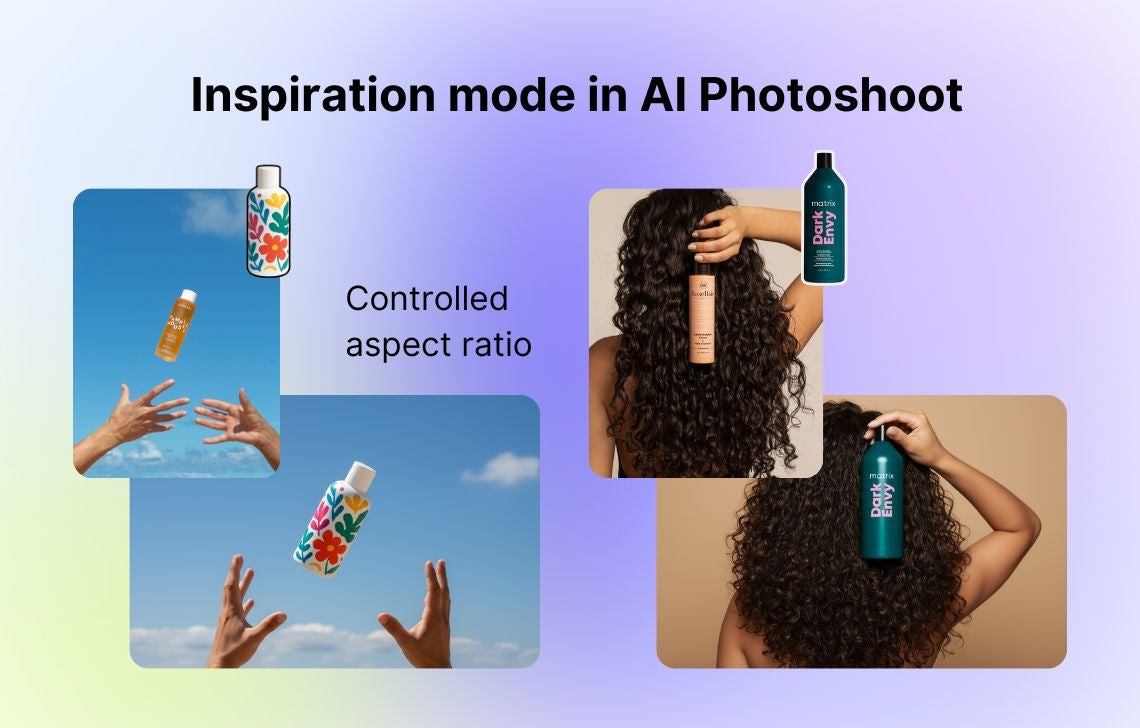
Pro tip: The result doesn’t have to follow the aspect ratio of the reference image: you can choose another one.
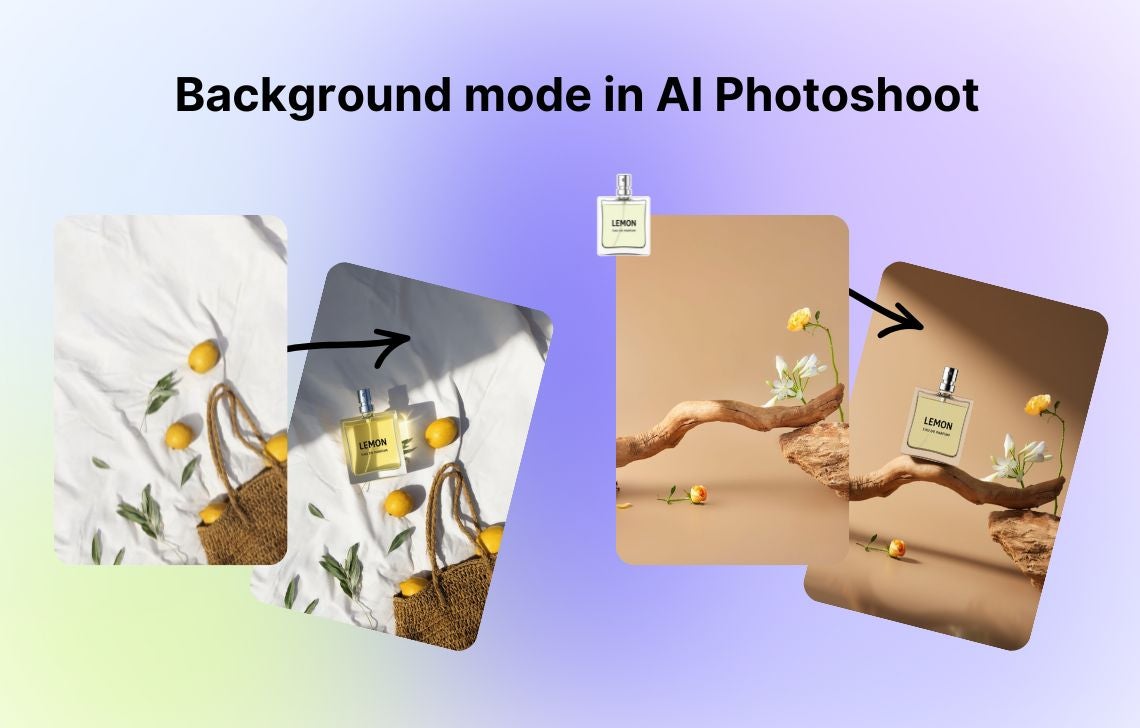
4. Choose Backgrounds for adding custom scenes
Background mode is built to keep your original product exactly as it was photographed while replacing only the backdrop around it.
Upload a custom background, and AI Photoshoot will match lighting, shadows, and reflections so the new scene feels natural without altering the product itself. The aspect ratio will depend on the uploaded background image.
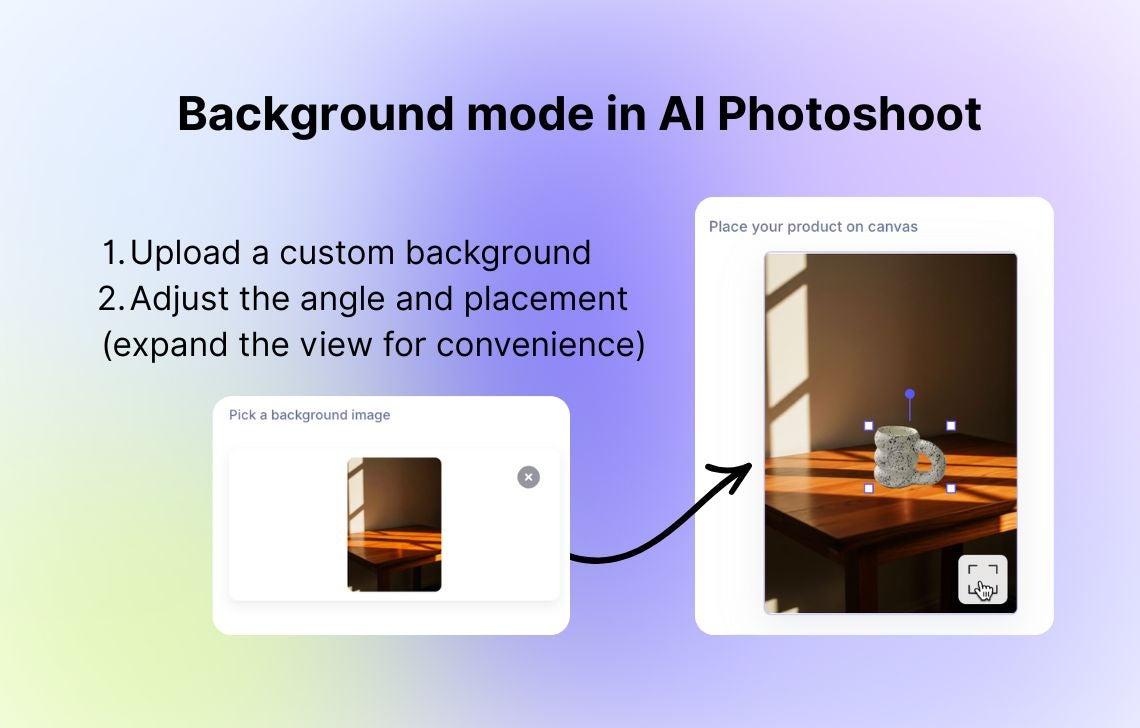
It’s ideal when you want some fresh, seasonal, or more polished backgrounds without doing a reshoot.
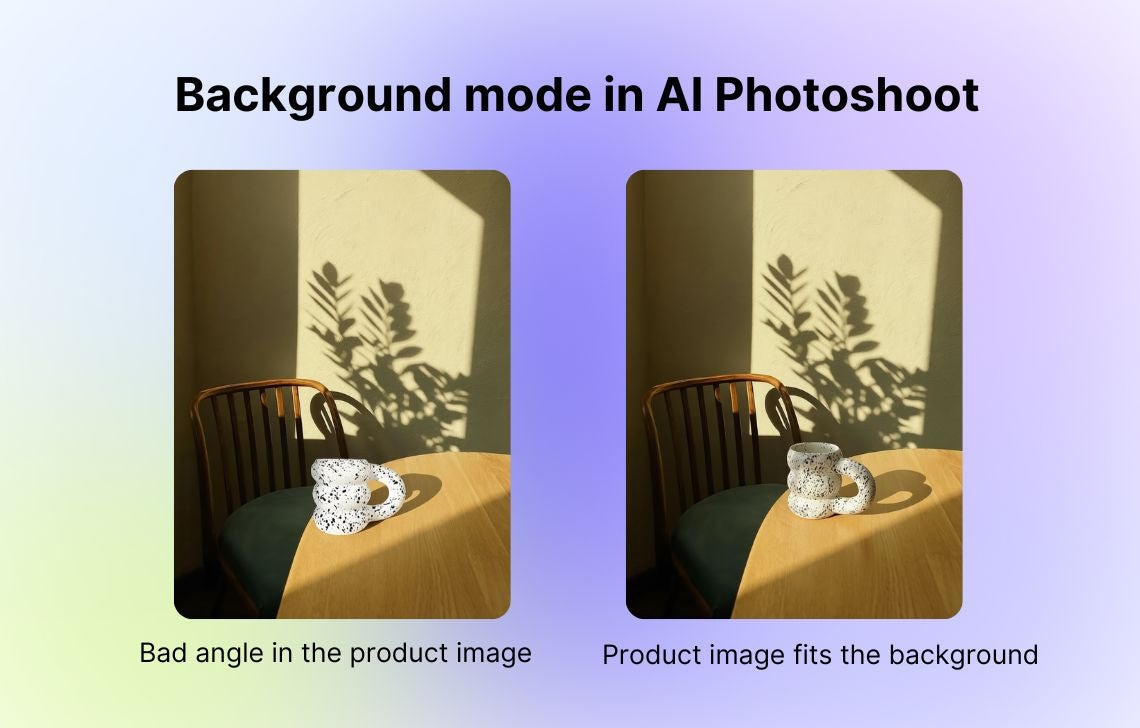
Pro tip: Not all backgrounds will fit your product accurately. Since this mode doesn’t change the product angle, use the source image that matches the perspective you want.
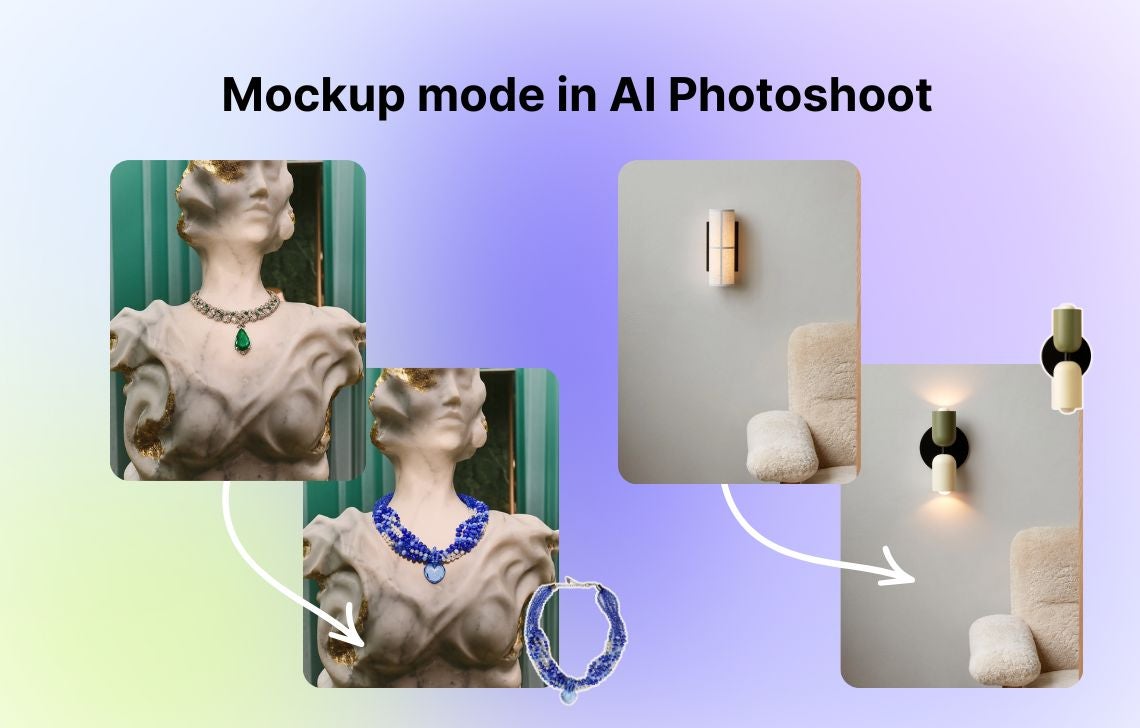
5. Choose Mockups for repeating the exact scene
Mockup mode is built to keep the entire photo exactly as it is while swapping only the product inside it.
You can reuse a setup for multiple products, which is ideal for demonstrating packaging updates or color variations, and testing multiple SKUs in the same perfectly controlled scene. The aspect ratio will depend on the uploaded mockup image.
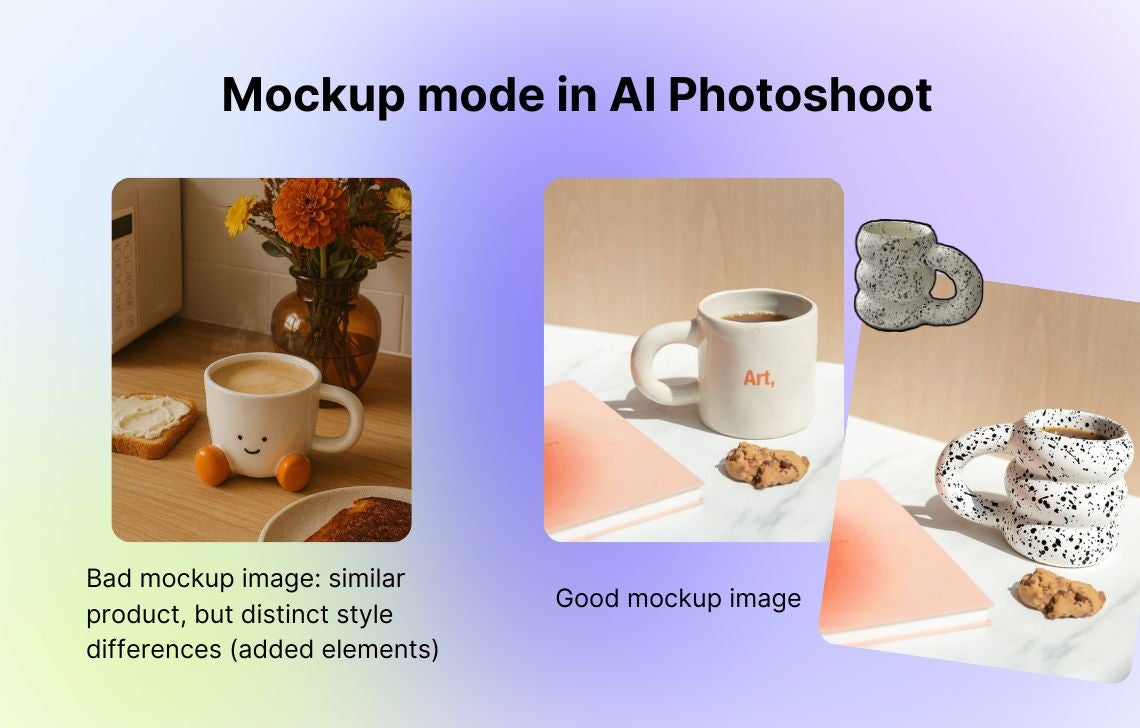
Pro tip: To get the best results out of this mode, use mockups with the product that’s almost identical in size and packaging.
Use AI Photoshoot to its full potential
These 5 AI Photoshoot modes unlock everything we’ve been building toward: real creative freedom without the friction of a traditional shoot.
Each mode adds its own kind of power, whether you’re refining a single shot, shaping a mood, or rebuilding a scene from the ground up. Together, they give you a photography toolkit that actually works the way you wish it always had: fast, flexible, and endlessly experimental.
Try them side by side and mix them into your workflow!
Need this at scale?
Process thousands of images via API, or let our team handle it for you.


Claid.ai
December 23, 2025