Tech
Add realistic backgrounds and swap products with the newest AI Photoshoot features


We’ve upgraded our AI Photoshoot with new modes: Backgrounds and Mockups.
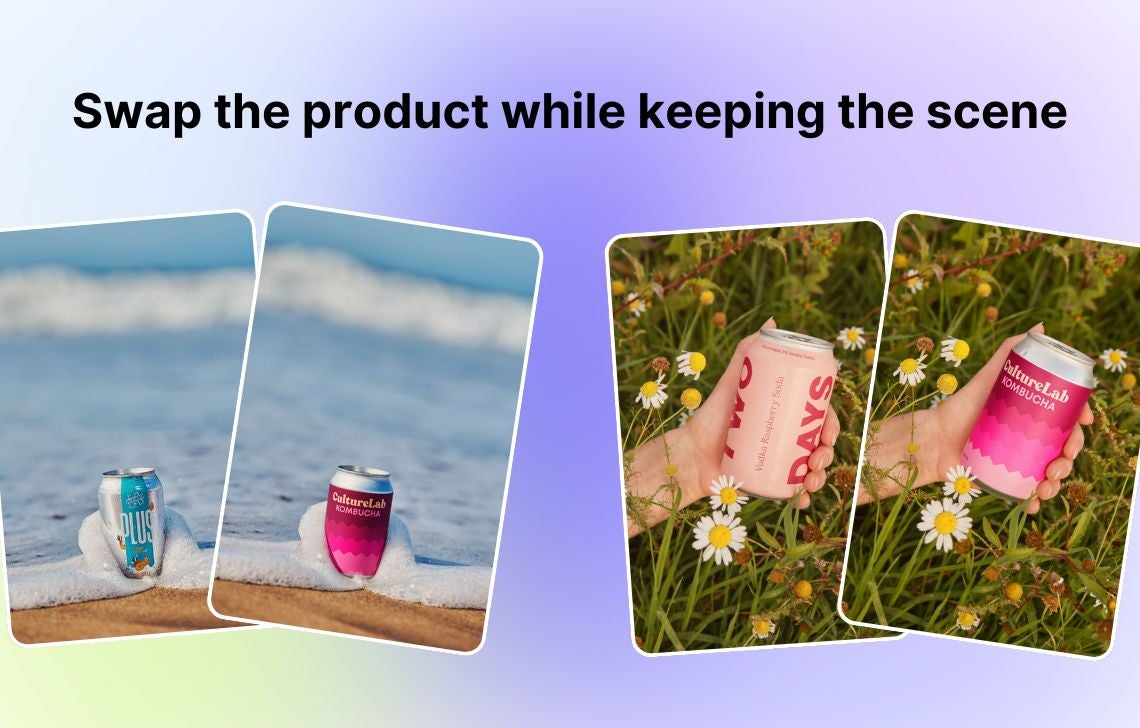
You can place your product in any scene you want (Background mode), or keep your photo exactly as it is and simply swap the product inside it (Mockup mode). No reshoots or rebuilding the setup every time you want to try something out.
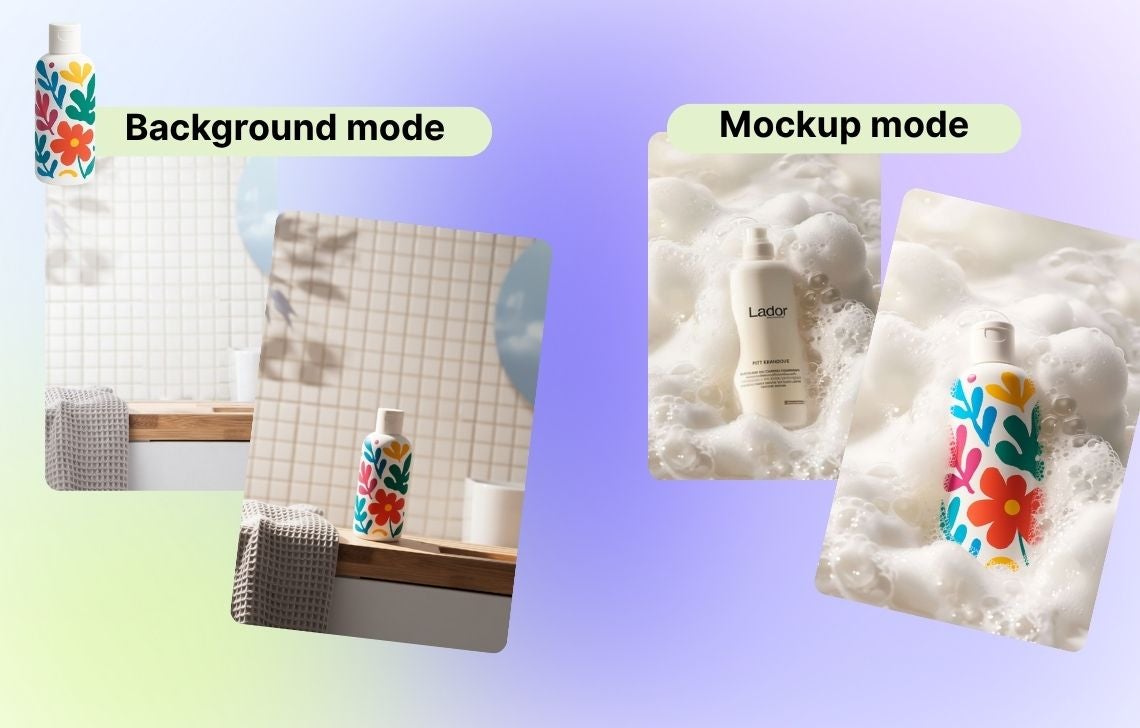
Both tools are trained to preserve your product, but they can introduce subtle, realistic changes in lights, shadows, and reflections to your background and mockup images.
We’ll share some tips on how to use Backgrounds and Mockups, and when each mode makes the most sense.
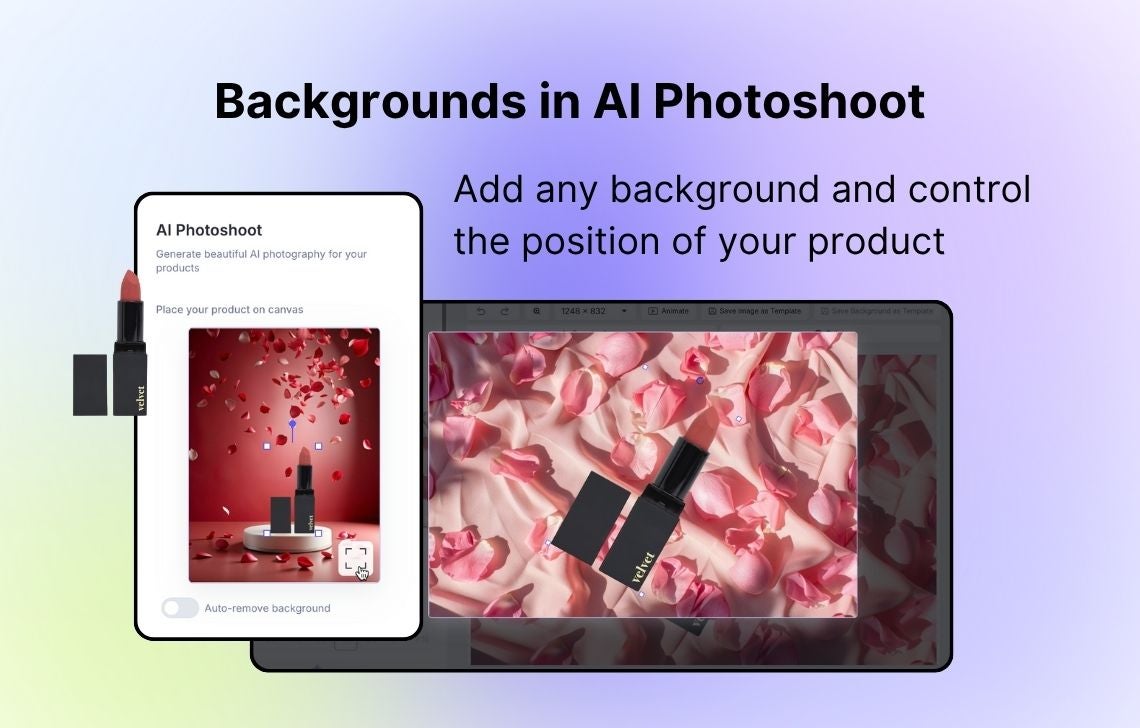
How to use Backgrounds in AI Photoshoot
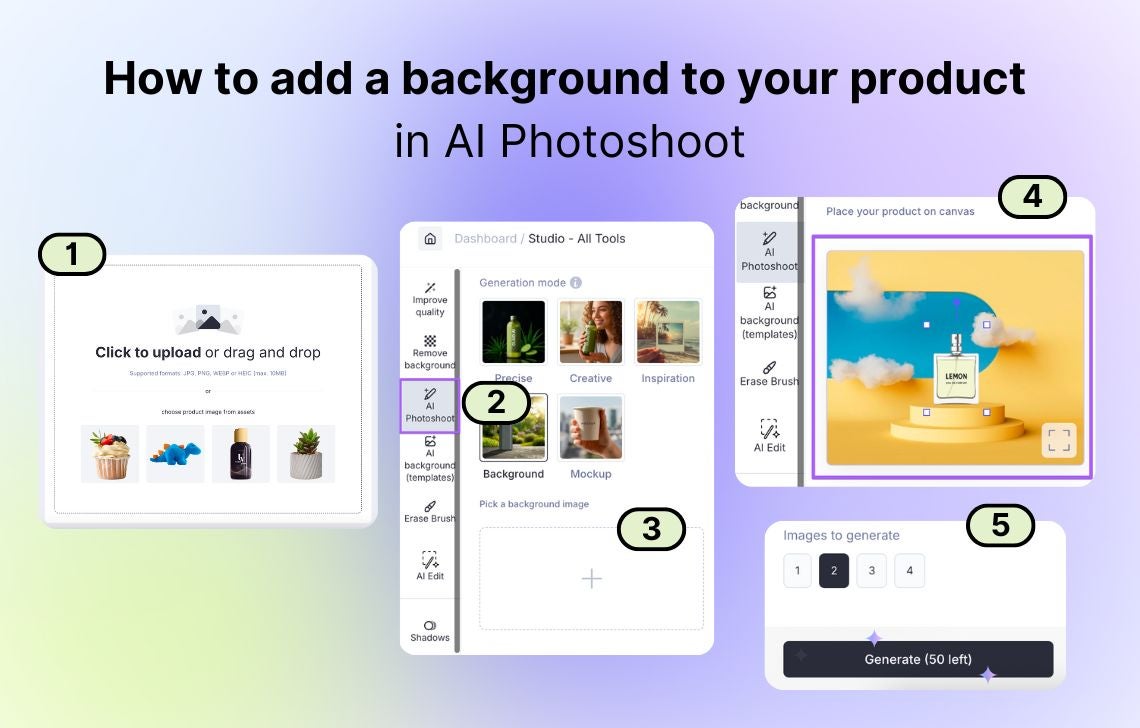
To add a custom background to your product photo:
- Upload the product image and remove the background (make sure to clip the image to avoid issues with product size)
- Go to AI Photoshoot and choose Background mode
- Upload the image you want to use as a background (use your own photos or copyright-free ones)
- Adjust the size and position of your product on the uploaded background (you can do it in the full-screen preview)
- Generate images (if you choose multiple outputs, they will be slightly different in lighting)
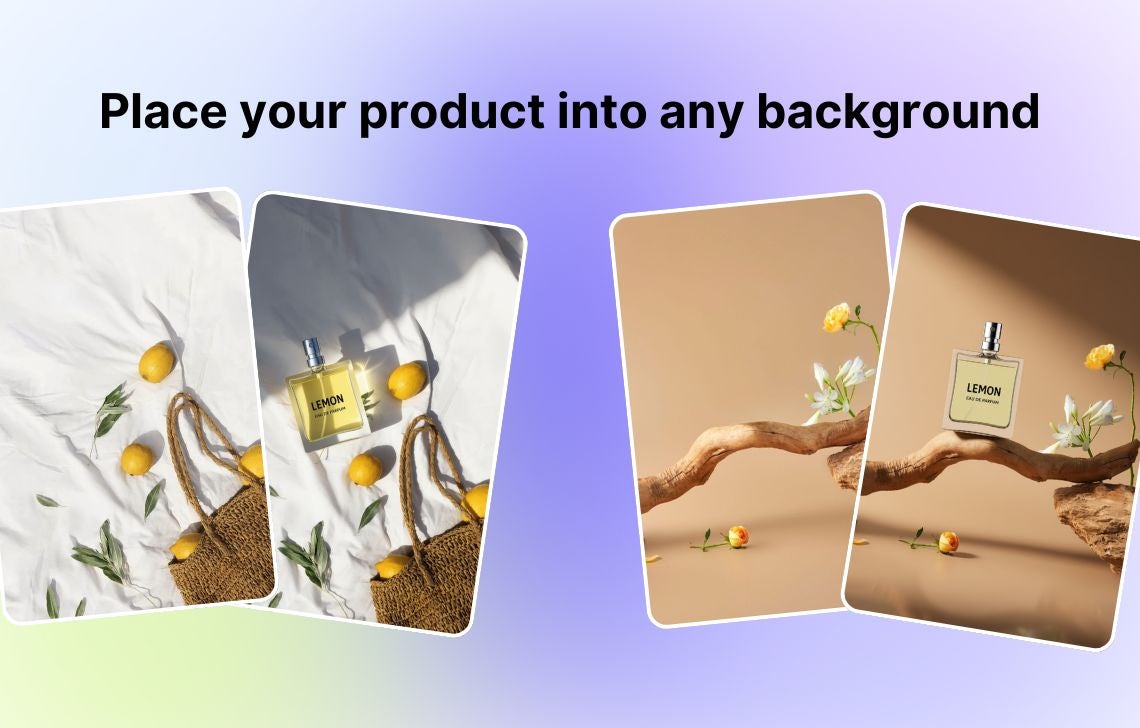
This mode lets you quickly generate full galleries of product photos with consistent backgrounds. Such controlled AI backgrounds are great for:
- Experimenting with locations without renting studios
- Trying out whimsical scenes that are hard or impossible to set up in real life
- Highlighting features through thematic setups
- Creating seasonal or holiday versions without reshooting
- Localizing campaigns for different regions or markets
- Building ad variations for A/B tests
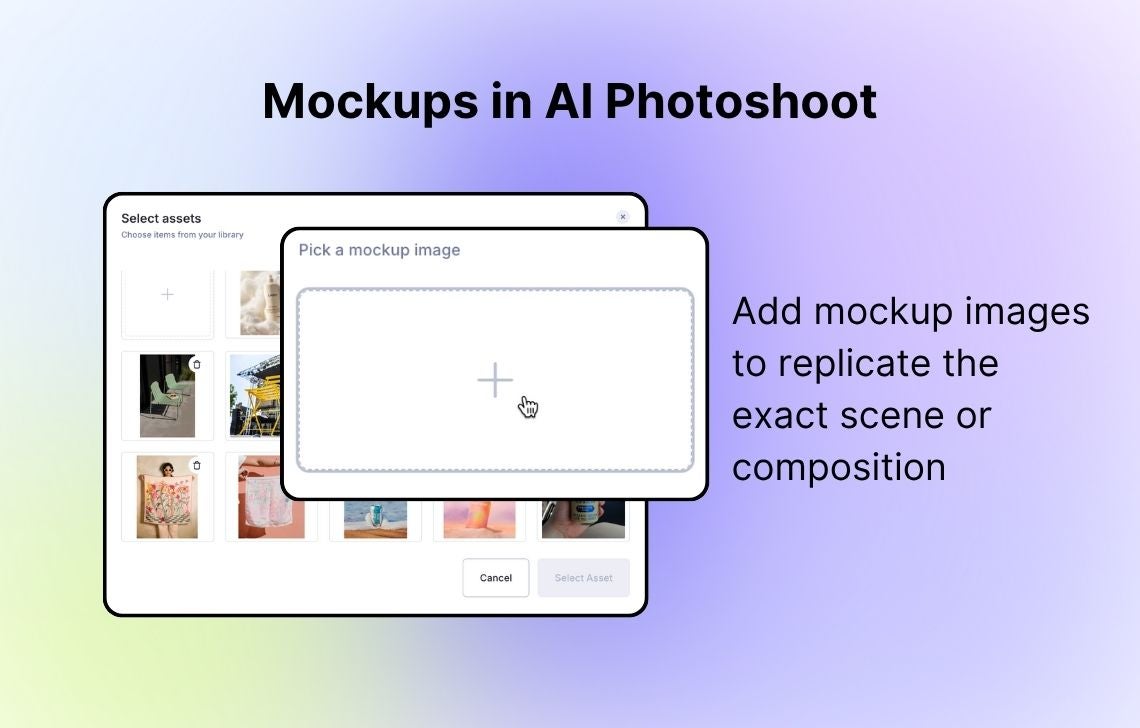
How to use Mockups in AI Photoshoot
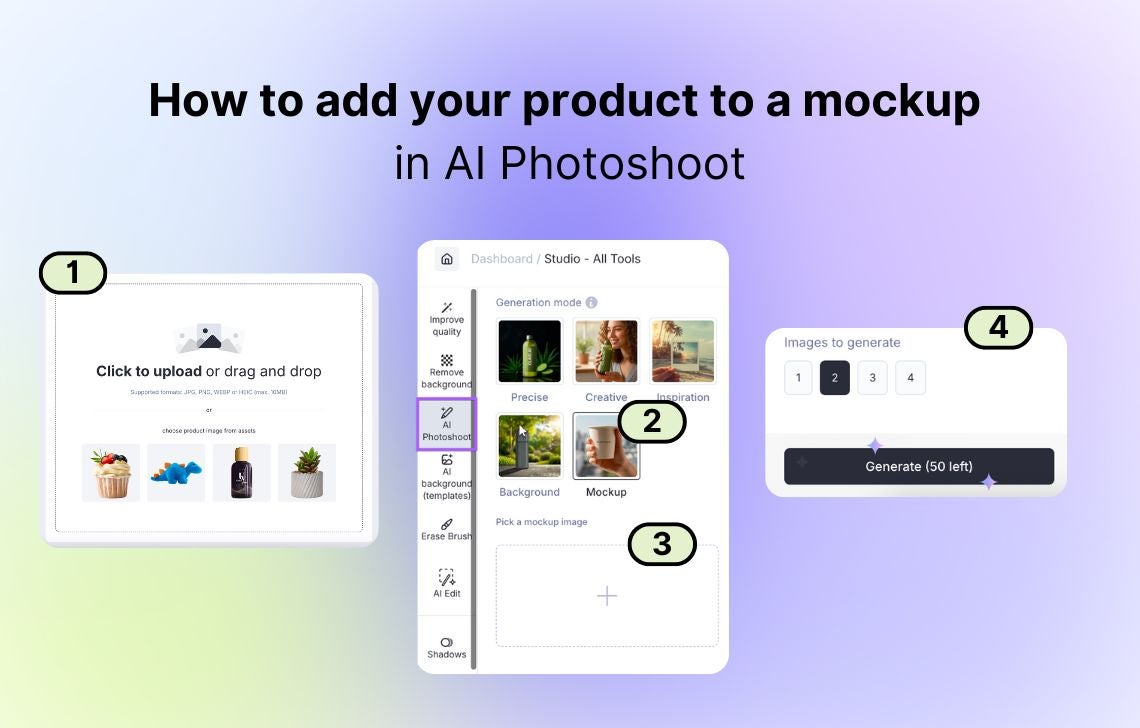
To use your images as mockups:
- Upload the product image
- Go to AI Photoshoot and choose Mockup mode
- Upload the image you want to use as a mockup (use your own photos or copyright-free ones)
- Generate images (go for multiple outputs to choose the best results)
Here are some tips to get the most out of Mockups and avoid unfruitful generations:
- Use high-quality, well-lit images. If you have an old photo with low resolution, upscale it before using it in AI Photoshoot.
- Use mockup images that contain a similar type of product. This will ensure realistic product placement.
- Don’t use images with multiple products as mockups. AI might not understand what product to swap.
- Don’t use photos where the product shape doesn’t match what you want to replace it with. For instance, uploading a mockup with a short and wide cream tube might change the shape of a long and slim hand tube.
- Use images you have the copyright to. If you want to replicate a cute idea from competitors, opt for Inspiration mode, which will reimagine the scene, or describe it in the prompt for Creative mode.
Mockups let you easily drop multiple products into the same scene and reuse successful compositions. Use this mode for:
- Replicating the exact scene you already have
- Generating consistent flatlays for different products
- Keeping lighting, shadows, and props identical across product updates
- Creating full collections with the same layout
- Updating photos for bundles without restyling
- Producing comparisons for product variations
Refresh your catalog with backgrounds and mockups
Whether you want to try unexpected locations, build seasonal campaigns, or keep a layout identical across dozens of products, you can do it all without multiple reshootings and post-production hurdles.
In our upgraded AI Photoshoot, Background mode helps you experiment with different scenes, while Mockup mode lets you swap products on existing photos with new ones. Test them out to iterate faster and maintain consistency across your catalog.
FAQ
What is Background mode?
Background mode lets you place your clipped product into any scene you upload. You control the size and position of your product, and our AI adjusts lighting and reflections so everything looks natural.
Does it replace AI Backgrounds?
It’s the next generation of what was previously called AI Backgrounds. Now, AI Photoshoot features 5 modes, and each of them will generate an AI background for your product (the difference is in how they process your prompts or reference images).
What types of images can I use as backgrounds?
You can use any image as long as you own the rights to it. The tool supports different dimensions and aspect ratios, just make sure that the photo has clear lighting and enough space to place your product. You can use real photos you took, as well as AI-generated images: there’s no limit to creative experimentation.
What is Mockup mode?
Mockup mode keeps your photo exactly as it is and swaps only the product inside it. Props and the overall composition stay intact, making it perfect for consistent flatlays and scene reuse.
How is it different from Inspiration mode?
Mockup mode preserves the original photo and replaces only the product. Inspiration mode reimagines the scene based on the reference. It recreates the vibe or layout, but not the exact objects.
What types of images can I use as mockups?
You can use any image as long as you own the rights to it and the product in the photo is similar in shape and type to the one you want to replace.
Need this at scale?
Process thousands of images via API, or let our team handle it for you.


Claid.ai
November 20, 2025